Categories
Instructions

instruction when paying with a chip card nyt

Understanding Chip Card Payments in New York

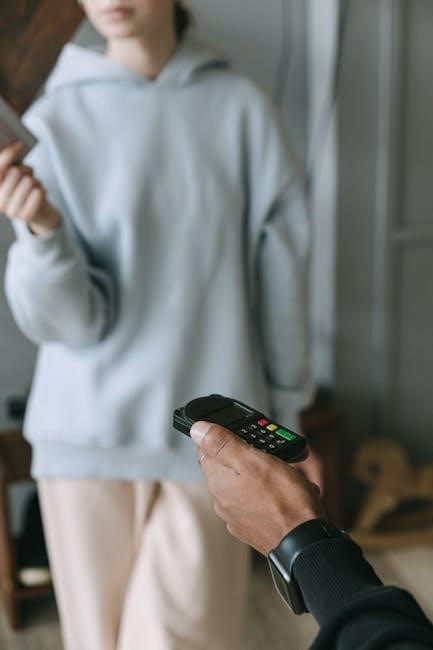
New York transitions to enhanced security with chip cards, requiring insertion—chip end first—into enabled terminals.
Follow on-screen prompts for signature or PIN verification during transactions.

What are Chip Cards?

Chip cards, formally known as EMV (Europay, Mastercard, and Visa) cards, represent a significant upgrade in payment security. Unlike traditional magnetic stripe cards, chip cards contain an embedded microchip that generates a unique transaction code for each purchase. This dynamic code makes it incredibly difficult for fraudsters to clone the card or use stolen information.

When used at a chip-enabled terminal, you’re prompted to insert the card, chip end first, and leave it in the terminal throughout the entire transaction. This differs from swiping, where data is read statically. The chip interacts with the terminal to authenticate the transaction, adding a layer of protection against unauthorized use. New York is actively adopting this technology, particularly with the upcoming changes to SNAP EBT benefits requiring chip-based processing.

Essentially, chip cards are designed to minimize fraud and provide a more secure payment experience for consumers in New York and beyond.

The Security Benefits of Chip Technology

Chip technology dramatically enhances payment security by creating a unique transaction code with each use, making it exceptionally difficult to counterfeit cards. This contrasts sharply with magnetic stripe cards, which transmit static data easily copied by fraudsters. The implementation of chip cards aims to reduce fraudulent purchases, a key driver behind the upgrades required for SNAP EBT acceptance in New York.

The process of inserting your card and leaving it in the terminal during the transaction is crucial. This allows the chip to authenticate the purchase, verifying its legitimacy; Retailers are undergoing terminal certification to ensure compatibility and secure processing.

Furthermore, the move towards chip cards supports contactless payments like Apple Pay, adding convenience while maintaining security. By generating a unique code for every transaction, chip technology offers a robust defense against fraud, protecting both consumers and merchants in New York’s evolving payment landscape.

Using Chip Cards for Everyday Purchases

Everyday purchases in New York now commonly utilize chip card technology; insert your card, chip-first, and leave it in the terminal until complete.

Inserting Your Chip Card: A Step-by-Step Guide

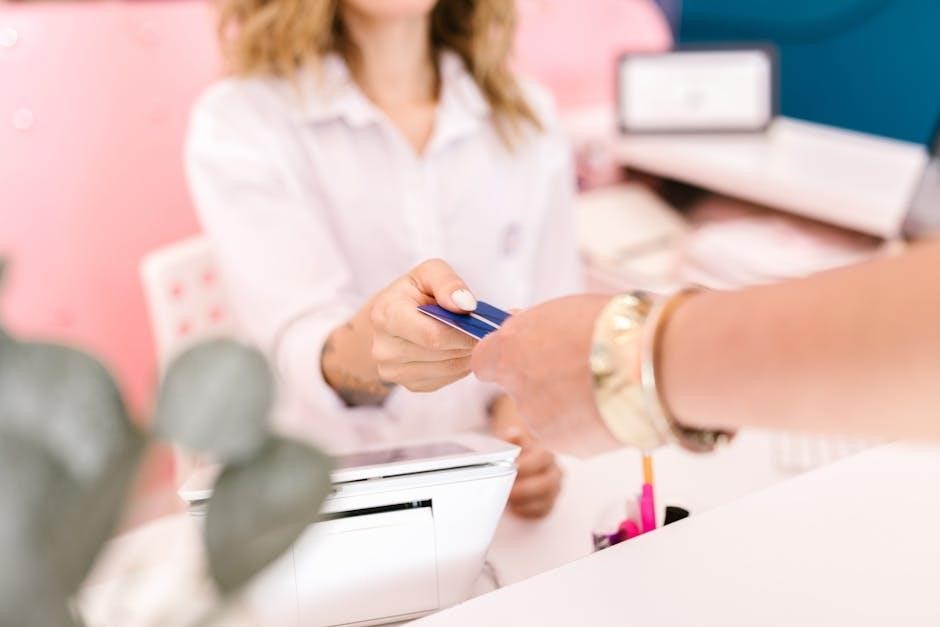
Navigating chip card payments in New York is straightforward. First, insert the card face up, ensuring the metallic chip is positioned to enter the terminal first. It’s crucial to leave the card within the terminal throughout the entire transaction process – do not remove it prematurely.

The terminal will then initiate communication with your bank to authorize the purchase. Follow the on-screen instructions carefully; you may be prompted to either sign for the transaction or enter your Personal Identification Number (PIN). The required method—PIN or signature—depends on your card issuer and the retailer’s setup.

Once authorization is complete, the terminal will signal you to remove your card. Avoid rushing this step. Always wait for the prompt before taking your card back. This ensures a secure and successful payment every time.

Contactless Payments: Tap-to-Pay with Chip Cards

New York City offers a convenient alternative to inserting your chip card: tap-to-pay. Many retailers now have terminals equipped with Near Field Communication (NFC) technology, allowing for contactless transactions. Simply hold your chip card near the contactless symbol – often depicted as a sideways Wi-Fi icon – on the payment terminal.

For iPhone users, setting up an Express Transit Card within the Wallet app streamlines the process. Once configured, you can tap your iPhone to pay without needing Face ID or a passcode, making subway fares and purchases incredibly fast. Remember to select a credit card for your Express Transit Card in settings.

This method is secure and quick, utilizing the same chip technology as insertion. Look for the contactless symbol and enjoy a seamless payment experience throughout the city!

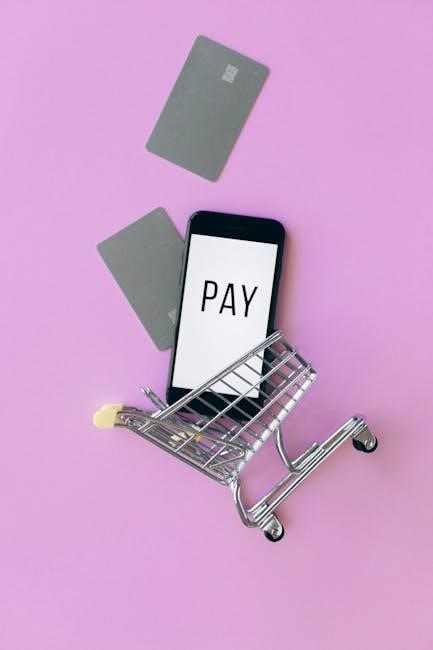
Apple Pay and Mobile Wallets in NYC

New York City embraces mobile payments, with Apple Pay leading the way. To utilize Apple Pay, add your chip cards to the Wallet app on your iPhone. Ensure you’ve set up an Express Transit Card within the Wallet settings, designating a preferred credit card for effortless subway and bus fares.

This feature bypasses the need for Face ID or passcode verification when tapping your iPhone at OMNY readers or contactless-enabled terminals. Simply hold your iPhone near the reader. Other mobile wallets, like Google Pay and Samsung Pay, function similarly, offering comparable convenience.

Mobile wallets enhance security by tokenizing your card details, protecting your actual card number during transactions. They represent a fast, secure, and increasingly popular method for paying throughout NYC, streamlining everyday purchases.

Chip Card Adoption and Deadlines

Retailers must upgrade terminals to accept chip-based SNAP EBT cards, with full adoption expected within 12-24 months. Certification is crucial for functionality.

The December SNAP Chip Law and EBT Cards

A new December SNAP Chip Law mandates upgrades to Electronic Benefit Transfer (EBT) systems across all states to support chip-based processing. This change aims to enhance security and reduce fraud when Supplemental Nutrition Assistance Program (SNAP) benefits are used for purchases.

Currently, both older magnetic stripe cards and the new chip-enabled cards may still function during a transition period. However, retailers and payment terminals must upgrade their card readers to ensure compatibility with the new chip technology. This upgrade is essential to continue accepting SNAP EBT payments as the transition progresses.

The expectation is that full chip adoption will be completed within 12 to 24 months, solidifying a more secure and reliable system for benefit recipients and retailers alike. This law represents a significant step towards modernizing the SNAP EBT payment infrastructure in New York and nationwide.

Retailer Upgrades and Terminal Certification

Retailers across New York are currently navigating the process of upgrading their payment terminals to accommodate chip card technology. These new terminals are designed to accept credit and debit cards with embedded digital chips, significantly reducing the risk of fraudulent transactions. However, simply installing the new hardware isn’t enough.

Before these payment systems can become fully operational, they must undergo a certification process. This certification ensures the terminals meet specific security standards and function correctly with chip card networks. Many retailers, as reported in 2016, have been waiting for this certification to be completed, causing delays in full chip card adoption.

The certification process can be complex and time-consuming, requiring coordination between retailers, payment processors, and card networks. Successful certification is crucial for retailers to legally and securely accept chip card payments, protecting both their business and their customers.

The Transition Timeline for Full Chip Adoption

The shift to full chip card adoption in New York, particularly concerning SNAP EBT benefits, isn’t immediate. While both older magnetic stripe cards and newer chip-enabled cards are currently functioning, the expectation is a complete transition within a 12-to-24-month timeframe, as of December 2025. This timeline necessitates retailers upgrading their card readers to support chip-based processing to continue accepting SNAP EBT payments.

This phased approach allows for a smoother transition, giving businesses time to secure certified terminals and train staff. However, it also means a period of coexistence where both card types are valid. Consumers should be prepared for potential variations in the payment experience depending on the retailer’s upgrade status.

The ultimate goal is enhanced security and fraud prevention, but the transition requires ongoing effort from retailers, payment networks, and government agencies to ensure a seamless experience for all New Yorkers.

Troubleshooting Chip Card Payments

If your chip card isn’t read, leave it in the terminal. Contact your card issuer if issues persist, and be ready for PIN or signature requests.

What to Do If Your Card Isn’t Read

Encountering issues when using your chip card in New York can be frustrating, but several steps can resolve the problem. First, ensure the card remains inserted throughout the entire transaction; do not remove it prematurely. If the terminal displays an error or fails to read the chip after a reasonable time, try re-inserting the card slowly and carefully, ensuring it’s facing the correct direction – chip end first.

Sometimes, a simple restart of the payment terminal by the merchant can resolve temporary glitches. If the issue persists, don’t hesitate to ask the merchant to try swiping your card as a backup method. If swiping also fails, contact your bank or card issuer immediately to report the problem and inquire about potential card replacement. Remember that retailers are still upgrading systems, and certification delays can occasionally cause issues.

Keep in mind that leaving the card in the terminal during the transaction is crucial for successful processing.

PIN vs. Signature: Which is Required?

The requirement for a PIN or signature when using a chip card in New York varies depending on the card issuer and the merchant’s terminal configuration. Generally, many newer chip card transactions now prompt for a PIN, enhancing security by adding an extra layer of authentication. However, signature verification remains a common fallback option, particularly at merchants who haven’t fully upgraded their systems.

Follow the on-screen instructions provided by the payment terminal. If prompted for a PIN, enter the four-digit code associated with your card. If a signature is requested, sign the receipt clearly; It’s important to remember your PIN, as relying solely on signature verification is becoming less frequent.

Contact your bank or card issuer if you are unsure whether your card requires a PIN or if you’ve forgotten it. They can provide clarification and assist with PIN reset procedures.

Specific NYC Payment Systems

NYC’s OMNY and commuter cards increasingly support tap-to-pay via NFC chips.
Adding commuter benefits to smartphone wallets streamlines subway and transit payments.

OMNY and Chip Card Compatibility

OMNY, New York City’s contactless payment system, demonstrates growing compatibility with chip card technology, though not in the traditional “chip-in” sense. While OMNY doesn’t require inserting your chip card, it readily accepts contactless payments enabled by the chip. This means you can simply tap your chip-enabled credit or debit card directly on the OMNY reader at subway stations and on buses.

For commuters utilizing benefit cards, the MTA recommends obtaining a card equipped with an NFC (Near Field Communication) chip. If your current card lacks this feature, contacting the issuing company is advised, as they typically provide replacements with NFC capabilities. Alternatively, adding your commuter benefit card to your smartphone’s digital wallet allows for seamless tap-to-pay functionality, leveraging the phone’s NFC chip for quick and convenient transit access. This eliminates the need for Face ID or PIN entry for express transit.

Essentially, OMNY prioritizes the contactless functionality derived from chip technology, offering a streamlined payment experience for New Yorkers.

Commuter Benefit Cards with NFC Chips

Commuter benefit cards are increasingly adopting NFC (Near Field Communication) chip technology to facilitate seamless transit payments in New York City. These cards, often used for pre-tax commuter expenses, can be tapped directly on OMNY readers, mirroring the convenience of contactless credit and debit cards.

However, not all commuter benefit cards initially came equipped with NFC chips. The MTA actively encourages cardholders to request updated cards from their benefit providers. Most companies readily issue replacements featuring the necessary NFC technology, enabling tap-to-pay functionality. If a direct replacement isn’t immediately available, a viable workaround exists: adding the commuter benefit card to your smartphone’s digital wallet.

By adding the card to Apple Pay, Google Pay, or similar platforms, the phone’s built-in NFC chip effectively transforms your smartphone into a contactless payment method. This allows for quick and easy fare payment on the subway and buses, streamlining the commuting experience and leveraging the security features inherent in chip-based technology.

Future of Chip Card Technology

Future advancements may bring enhanced chip card features and security protocols to New York payments; Expect potential innovations improving transaction speed and fraud prevention.

Potential Enhancements and New Features

The evolution of chip card technology in New York promises several exciting enhancements. Beyond the current chip and PIN/signature methods, we can anticipate increased integration with biometric authentication, potentially utilizing fingerprint or facial recognition for added security and convenience. Contactless payments, already popular through tap-to-pay and mobile wallets like Apple Pay, will likely become even more seamless and widespread.

Furthermore, dynamic CVV technology – where the security code changes with each transaction – could significantly reduce online fraud. The December SNAP chip law necessitates upgrades, pushing retailers to adopt more sophisticated systems. Expect terminals to become smarter, offering faster processing times and improved error handling. Ultimately, these advancements aim to create a more secure, efficient, and user-friendly payment experience for all New Yorkers, building upon the foundation of chip-based security.

Categories
Instructions

passover instructions deuteronomy

Passover Instructions in Deuteronomy: A Comprehensive Plan

Deuteronomy meticulously details Passover observance, emphasizing centralized worship at a divinely chosen location, differing from earlier instructions. Sacrifices—cow, sheep, or goat—must be blemish-free.

The text stresses complete consumption of the offering and a seven-day observance of unleavened bread, commemorating the hasty exodus from Egypt and covenant with God.

Passover, a cornerstone of Jewish faith, commemorates the liberation of the Israelites from Egyptian slavery, a pivotal event recounted in the book of Exodus. Deuteronomy revisits these foundational laws, offering a unique perspective and expanding upon earlier directives. This book, presented as Moses’ final address, isn’t merely a repetition; it’s a theological re-centering, preparing the Israelites for life in the Promised Land.

Deuteronomy’s Passover instructions aren’t isolated decrees but are interwoven with broader themes of covenant faithfulness and centralized worship; The text emphasizes the importance of remembering the Exodus narrative, solidifying the relationship between God and His people. It’s a call to intentional observance, ensuring the sacred memory remains vibrant for generations to come, shaping their identity and devotion.

II. Historical Context of Deuteronomy’s Passover Laws

Deuteronomy’s Passover laws emerge from a specific historical juncture: the Israelites poised to enter Canaan. Unlike Exodus, penned during the immediate aftermath of the Exodus event, Deuteronomy reflects a settled, agrarian society. This context explains the emphasis on a “chosen place” for sacrifice, a necessity for a nation establishing territorial control and religious unity.

The centralization of worship wasn’t simply logistical; it was a deliberate attempt to counteract the syncretistic influences prevalent in Canaanite religion. By designating a single sanctuary, Deuteronomy aimed to prevent the blending of Yahweh worship with local deities. This reflects a concern for maintaining the purity of the covenant and fostering a distinct Israelite identity amidst a foreign culture.

III. Centralization of Worship: The Core Directive

Deuteronomy fundamentally alters Passover practice by mandating centralized worship. The text explicitly forbids sacrificing the Passover animal “in any of your towns” but “only at the place where the Lord your God chooses.” This directive represents a significant departure from earlier traditions where sacrifices could occur in various locations, even within individual homes.

This centralization wasn’t arbitrary. It served as a crucial safeguard against religious fragmentation and the adoption of foreign cultic practices. By channeling worship to a single, designated sanctuary, Deuteronomy sought to preserve the integrity of Israelite faith and reinforce the exclusive devotion owed to Yahweh, preventing syncretism and fostering national religious cohesion.

III.A. The Chosen Place for Sacrifice

Deuteronomy repeatedly emphasizes the necessity of offering the Passover sacrifice at “the place where the Lord your God chooses to be worshiped.” This isn’t a pre-determined location initially revealed; rather, it’s a place God will subsequently designate as a dwelling for His Name. The text doesn’t disclose this location at the time of writing, creating anticipation and highlighting God’s sovereign choice.

This chosen place becomes the focal point for all Passover observance, requiring Israelites to undertake pilgrimage to participate. The repeated phrasing underscores the importance of obedience to divine instruction and the rejection of localized, independent worship practices. It establishes a singular, authorized site for communal religious expression.

III.B. Reasons for Centralization – Preventing Syncretism

Centralizing Passover worship in a single, divinely chosen location served a crucial purpose: preventing the assimilation of Canaanite religious practices – syncretism. Allowing sacrifices in multiple towns would inevitably lead to the blending of Yahweh worship with the local deities and their associated rituals. Deuteronomy actively combats this threat by mandating a unified, controlled religious experience.

This centralization ensured the purity of worship, safeguarding against the adoption of foreign religious elements. By directing all Israelites to one sacred site, Deuteronomy reinforced the exclusive nature of their covenant with God and minimized the risk of religious compromise, fostering a distinct and unified Israelite identity.

IV. The Passover Sacrifice: Animal Selection

Deuteronomy specifies acceptable animals for the Passover sacrifice: a cow, a sheep, or a goat. This provides options while maintaining a defined scope for the offering. The selection wasn’t arbitrary; these animals were commonly used in sacrificial systems and represented valued possessions, signifying a substantial offering to God.

Crucially, the chosen animal had to be without blemish – physically perfect and free from any defects. This requirement symbolized the Israelites’ desire to offer their best to God, reflecting His own perfection. A flawless sacrifice represented a sincere and complete devotion, emphasizing the sacredness of the ritual.

IV.A. Permitted Animals – Cow, Sheep, or Goat

Deuteronomy explicitly permits the use of a cow, a sheep, or a goat as the Passover sacrifice. This limited selection wasn’t random; these animals were integral to the agricultural and pastoral life of ancient Israel, representing common wealth and sustenance. Offering them signified a dedication of one’s livelihood to God.

The allowance of three options provided flexibility for families based on their resources and availability. Each animal held symbolic weight, representing different aspects of prosperity and flock management. This demonstrates a practical yet reverent approach to the sacrificial requirements, ensuring accessibility for all Israelites.

IV.B. Quality and Blemish-Free Requirements

Deuteronomy, mirroring broader sacrificial laws, mandates that the Passover animal be without blemish. This wasn’t merely an aesthetic concern; physical perfection symbolized spiritual wholeness and the offering’s inherent worthiness before God. Any defect rendered the animal unacceptable for sacrifice.

A blemish could include physical impairments, diseases, or any deviation from the animal’s natural state. Presenting a flawed offering implied a lack of reverence or a diminished commitment to the covenant. The requirement underscored the need for offering God one’s best, reflecting a desire for complete acceptance and reconciliation.

V. The Ritual of the Passover Sacrifice

Deuteronomy’s Passover ritual centers on precise procedures performed at the chosen sanctuary. The selected animal—cow, sheep, or goat—underwent careful slaughter and preparation by designated individuals. This involved specific techniques to ensure ritual purity and proper offering.

The offering wasn’t a private act; it was a communal event performed before the Lord. Following preparation, the sacrifice was presented at the altar, symbolizing dedication and atonement. This centralized location, emphasized in Deuteronomy, distinguished it from earlier practices, reinforcing the covenant relationship with God through prescribed worship.

V.A. Slaughtering and Preparation

Deuteronomy doesn’t explicitly detail the method of slaughtering, but ritual purity was paramount. The chosen animal – cow, sheep, or goat – required careful preparation for offering. This likely involved specific washing and inspection procedures to confirm its blemish-free status, adhering to divine standards.

Preparation extended beyond the animal itself, encompassing the tools and the individuals involved. Maintaining ritual cleanliness throughout the process was crucial. This meticulous preparation signified reverence and respect before presenting the sacrifice at the chosen place, emphasizing the sacredness of the act and its connection to the covenant.

V.B. Offering at the Chosen Place

Deuteronomy firmly mandates that the Passover sacrifice be offered solely at “the place the Lord your God chooses.” This centralization distinguishes it from earlier instructions allowing for sacrifices at various locations. Transporting the prepared animal to this designated sanctuary was a pilgrimage, reinforcing communal identity.

The offering wasn’t a private act; it was a public demonstration of covenant faithfulness. Priests, or those designated by God, would oversee the offering, ensuring adherence to ritual law. This centralized location prevented localized, potentially syncretistic practices, maintaining purity of worship and honoring God’s chosen dwelling place.

VI. Consumption of the Passover Offering

Deuteronomy emphasizes complete consumption of the Passover sacrifice. Israelites were commanded to “eat all of the meat of it” during the designated time. This wasn’t merely a meal, but a sacred act of communion with God, remembering His deliverance from Egypt.

Leaving any remains until morning was strictly prohibited; any leftover meat had to be burned. This underscored the urgency and totality of the remembrance. The consumption, linked to the seven days of unleavened bread, symbolized both affliction endured and the haste of the Exodus, reinforcing the covenant relationship.

VI.A. Eating the Meat – Complete Consumption

Deuteronomy distinctly instructs Israelites to “eat all of the meat of it,” signifying a complete and thorough consumption of the Passover sacrifice. This wasn’t a partial offering; it demanded full participation and remembrance. The act of eating was integral to reliving the Exodus experience and acknowledging God’s provision.

This complete consumption wasn’t simply about quantity, but about a deliberate act of faith and gratitude. It symbolized fully receiving God’s deliverance and committing to the covenant. Every part of the animal held significance, demanding respectful and total utilization.

VI.B. Restrictions on Leaving Any Remains

Deuteronomy emphatically prohibits leaving any portion of the Passover sacrifice until the morning. Any remaining meat was to be burned completely, demonstrating reverence and preventing misuse. This directive underscored the sacredness of the offering and the seriousness of the covenant relationship with God.

Leaving remains wasn’t merely wasteful; it was considered disrespectful and a potential source of defilement. The complete disposal by burning ensured nothing remained to be consumed improperly or treated with indifference. This practice reinforced the idea that the sacrifice was entirely for God and His people’s remembrance.

VII. The Seven Days of Unleavened Bread (Matzah)

Deuteronomy mandates a seven-day observance of eating unleavened bread, known as Matzah, alongside the Passover sacrifice. This prohibition of “chametz” – leaven or any fermented product – directly commemorates the Israelites’ hasty departure from Egypt, where they lacked time for bread to rise.

The Matzah symbolizes affliction and the urgency of their liberation. It serves as a constant reminder of their ancestors’ suffering and God’s powerful intervention. This period isn’t simply about dietary restriction; it’s a spiritual exercise in humility and gratitude, reinforcing the significance of freedom and the covenant.

VII.A. The Prohibition of Leaven (Chametz)

Deuteronomy explicitly prohibits the consumption of leavened bread, or “chametz,” during the seven days of Unleavened Bread accompanying the Passover festival. This isn’t a mere dietary rule, but a foundational element of the observance, deeply rooted in the Exodus narrative.

The absence of leaven symbolizes the Israelites’ hurried flight from Egypt, lacking even the time to allow their bread to rise. Removing chametz from one’s home represents a purification, a spiritual cleansing mirroring the liberation from slavery. It’s a tangible act of remembering and re-experiencing the urgency of freedom.

VII.B. Symbolic Meaning of Unleavened Bread – Affliction and Haste

Deuteronomy connects the consumption of unleavened bread, or “matzah,” to both the “bread of affliction” and the haste of the Exodus. The text emphasizes that the Israelites departed Egypt so quickly they couldn’t wait for their bread to rise, necessitating the use of unleavened dough.

This isn’t simply a historical detail; it’s a powerful symbol. The matzah serves as a constant reminder of the hardship endured during slavery, the “affliction” of their ancestors. Simultaneously, it embodies the miraculous speed of liberation, a testament to God’s power and faithfulness in delivering His people.

VIII. Observance During the Centralized Passover

Deuteronomy’s instructions for the centralized Passover emphasize joyful celebration and broad family participation at the chosen sanctuary. Unlike Exodus, which details home consumption, Deuteronomy focuses on communal worship at the designated location, reinforcing the covenant relationship with God.

This observance isn’t merely ritualistic; it’s a deliberate act of remembrance. Families are to actively recall the Exodus narrative, recounting the story of liberation to future generations. The atmosphere should be one of rejoicing, acknowledging God’s faithfulness and celebrating freedom from oppression.

VIII.A. Joyful Celebration and Family Participation

Deuteronomy’s Passover instructions inherently call for a joyful celebration, a communal expression of gratitude for deliverance. This isn’t a somber obligation, but a festive occasion meant to be shared with family. The text implies active participation from all household members, fostering a sense of unity and shared identity.

The emphasis on centralized worship encourages families to journey together, strengthening bonds through shared experience. This pilgrimage aspect transforms Passover into a collective act of devotion, reinforcing the importance of community and familial ties within the broader Israelite nation. It’s a time for rejoicing and remembrance.

VIII.B. Remembering the Exodus from Egypt

Deuteronomy’s Passover regulations are fundamentally rooted in the imperative to remember the Exodus from Egypt. This isn’t merely a historical recollection, but a vital act of faith, reaffirming God’s redemptive power and covenant faithfulness. The entire ritual serves as a tangible reminder of liberation from slavery and divine intervention.

The consumption of unleavened bread, “the bread of affliction,” specifically symbolizes the haste with which the Israelites departed, unable to allow their dough to rise. This physical act connects the present observance to the past experience, ensuring the story is passed down through generations, solidifying national identity and devotion.

IX. Deuteronomy’s Unique Emphasis on Centralization Compared to Exodus

Deuteronomy markedly diverges from Exodus regarding Passover observance by introducing a strong emphasis on centralization of worship. While Exodus allows for sacrifices to be offered in individual homes, Deuteronomy explicitly restricts the Passover sacrifice to “the place where the Lord your God chooses.”

This directive wasn’t simply about logistical convenience; it was a deliberate effort to consolidate religious practice and prevent the proliferation of localized, potentially syncretistic worship. Deuteronomy aims to establish a unified religious identity, focused on a single, divinely appointed sanctuary, reinforcing monotheism and covenant fidelity.

X. The Role of the Priest (Kohen) in Passover Observance

While Deuteronomy doesn’t explicitly detail the priest’s (Kohen) duties during Passover with the same granularity as later texts, their role is implicitly crucial within the framework of centralized worship. The chosen sanctuary, where sacrifices are permitted, would naturally be overseen by the priestly class.

Priests were responsible for ensuring the proper selection of animals, the correct slaughtering and preparation of the sacrifice, and the meticulous adherence to ritual purity. They acted as mediators between the people and God, ensuring the offering was acceptable and the covenant maintained. Their expertise was vital for a lawful observance.

XI. Regulations for Those Unable to Reach the Central Sanctuary

Deuteronomy’s strict mandate for centralized Passover observance presents a challenge for Israelites residing far from the “place the Lord chooses.” The text, however, doesn’t offer explicit accommodations for those unable to travel. This contrasts with later rabbinic interpretations that developed solutions.

The emphasis on the chosen location suggests that observing Passover outside of it would not be considered a valid fulfillment of the commandment. The law prioritizes communal worship and covenant renewal at the designated sanctuary, implying a strong expectation of pilgrimage. Practical solutions were likely addressed through oral tradition.

XII. The Significance of the “Place the Lord Chooses”

The repeated phrase “the place the Lord your God chooses” in Deuteronomy’s Passover instructions is central to understanding its theological intent. This isn’t merely a geographical location, but a divinely appointed space representing God’s presence and authority. Centralization aimed to prevent localized, potentially syncretistic worship practices.

The chosen place symbolized unity among the tribes of Israel, fostering a shared religious identity and reinforcing the covenant relationship with God. It underscored that worship wasn’t a private matter, but a communal act directed towards a single, sovereign deity. This location became the focal point for national religious life.

XIII. Passover and the Covenant Relationship with God

Deuteronomy’s Passover regulations aren’t simply ritualistic; they are deeply intertwined with the covenant established between God and Israel. The sacrifice serves as a continual remembrance of God’s redemptive act – liberating Israel from Egyptian bondage. This act solidified the covenant, obligating Israel to faithfulness and obedience.

Observing Passover, therefore, wasn’t merely recalling a historical event, but reaffirming their commitment to the covenant. The centralized worship, mandated by Deuteronomy, further emphasized this communal covenant relationship, uniting the people under God’s authority and promise.

XIV. The Connection Between Passover and the Agricultural Cycle

Deuteronomy’s placement of Passover within the month of Nisan, coinciding with the early barley harvest, suggests a deliberate connection to the agricultural cycle. The timing isn’t accidental; it links the celebration of liberation with the provision of sustenance.

The offering of the first fruits during Passover acknowledges God as the source of the land’s bounty. This intertwining of redemption and agricultural blessing reinforces the idea that God’s faithfulness extends to both spiritual and physical well-being, demonstrating a holistic covenant relationship.

XV. The Timing of the Passover Sacrifice – The Month of Nisan

Deuteronomy firmly establishes Nisan as the designated month for the Passover sacrifice, aligning with the lunar calendar and the spring equinox. This timing isn’t arbitrary; it’s intrinsically linked to the agricultural cycle, specifically the barley harvest, marking a season of renewal and provision.

The specification of Nisan ensures consistency in observance and connects the commemoration of the Exodus with the natural rhythms of the land. This deliberate scheduling underscores God’s faithfulness in delivering both from bondage and providing for physical needs, solidifying the covenant relationship.

XVI. The Importance of Remembering the Exodus Narrative

Deuteronomy profoundly emphasizes the vital necessity of remembering the Exodus from Egypt during Passover. This isn’t merely a historical recollection, but a foundational act of faith, reinforcing the covenant relationship with God. The narrative serves as a constant reminder of God’s redemptive power and unwavering commitment to His people.

Moses’ words implore future generations to transmit the story, ensuring it remains vivid and impactful. Remembering the affliction and subsequent liberation fosters gratitude, humility, and a deepened understanding of God’s character, shaping their identity and guiding their obedience.

XVII. Passover Observance and Social Justice

While Deuteronomy’s Passover instructions primarily focus on ritual purity and centralized worship, the underlying themes resonate with social justice concerns. The remembrance of the Israelites’ own experience as oppressed slaves in Egypt inherently fosters empathy for the vulnerable and marginalized.

The text implicitly calls for extending compassion and protection to those in need – the widow, the orphan, and the sojourner – mirroring God’s own care for His people during their time of affliction. Observing Passover, therefore, isn’t solely about religious observance, but also about embodying ethical behavior and striving for a just society.

XVIII. The Prohibition of Delaying the Sacrifice

Deuteronomy firmly prohibits delaying the Passover sacrifice beyond its appointed time. This isn’t merely a matter of adhering to a schedule, but a demonstration of obedience and reverence for God’s established order. The timing is intrinsically linked to the commemoration of the Exodus, a pivotal event demanding precise remembrance.

Delaying the sacrifice would diminish the potency of the ritual and potentially disrupt the communal experience. The text underscores the importance of intentionality and promptness in fulfilling religious obligations, reflecting a commitment to honoring God’s commands without reservation or procrastination.

XIX. The Role of Intentionality in Passover Observance

Deuteronomy’s Passover instructions aren’t simply a list of actions, but a call for deliberate and purposeful worship. The text implies that the act of remembering the Exodus—and honoring God through the sacrifice—requires conscious engagement and heartfelt devotion. It’s not enough to merely perform the ritual; one must understand its significance.

This intentionality extends to the consumption of the offering and the avoidance of leaven, symbolizing a complete rejection of past idolatry and a wholehearted embrace of the covenant relationship with God. The emphasis is on a mindful and reverent participation in the sacred event.

XX. Passover as a Pilgrimage Festival

Deuteronomy fundamentally re-frames Passover as a pilgrimage festival, distinct from the more localized celebrations described in Exodus. The centralization of worship—sacrificing “only at the place where the Lord your God chooses”—necessitates travel to the designated sanctuary. This journey isn’t merely logistical; it’s an integral part of the observance.

The pilgrimage signifies a deliberate act of devotion, a physical manifestation of commitment to God and the covenant. It fosters a sense of communal identity as Israelites from all regions gather to worship together, reinforcing their shared history and faith.

XXI. The Relationship Between Passover and Other Festivals

Deuteronomy subtly connects Passover to the broader cycle of Israelite festivals, particularly through the counting of the “seven weeks” following Passover. This period leads directly to Shavuot (Weeks), establishing a sequential link between the commemoration of the Exodus and the giving of the Law at Sinai.

While Deuteronomy doesn’t explicitly detail these connections as extensively as other texts, the emphasis on agricultural cycles and remembrance suggests an interwoven relationship. Passover initiates a period of spiritual preparation culminating in the acceptance of God’s covenant, shaping the entire festival calendar.

XXII. Modern Interpretations of Deuteronomy’s Passover Laws

Modern interpretations of Deuteronomy’s Passover laws grapple with the historical context of centralized worship and its relevance today, given the absence of a central Temple. Many scholars emphasize the symbolic importance of the “chosen place,” viewing it as representing a commitment to intentionality and spiritual focus in worship.

Contemporary observances often prioritize the narrative of liberation and covenant renewal, adapting the sacrificial elements to acts of charity and remembrance. The emphasis on remembering the Exodus resonates strongly with modern movements for social justice and freedom, offering a powerful message of hope and redemption.

XXIII. Conclusion: The Enduring Legacy of Passover in Deuteronomy

Deuteronomy’s detailed Passover instructions, though rooted in ancient ritual, continue to shape Jewish identity and practice. The emphasis on centralized worship, while historically specific, underscores the importance of intentionality and communal observance. The narrative of liberation from Egypt remains a central tenet, inspiring generations to strive for freedom and justice.

The laws regarding sacrifice and unleavened bread symbolize remembrance and renewal of the covenant with God. Deuteronomy’s legacy lies in its enduring call to remember, celebrate, and live out the principles of freedom and faith, ensuring Passover’s continued relevance.

Categories
Instructions

eggo grab and go instructions

Eggo Grab & Go Waffles: A Comprehensive Guide

Eggo Grab & Go waffles offer a convenient breakfast solution for busy individuals! These individually wrapped waffles, available in Buttery Maple and Strawberry, can be enjoyed immediately, thawed quickly, or warmed to perfection using various methods.

Eggo Grab & Go waffles represent a delightful innovation in the breakfast landscape, specifically designed for today’s fast-paced lifestyles. Introduced in April 2022, these Liege-style waffles offer a convenient and tasty solution for busy parents and individuals seeking a quick, satisfying meal. Unlike traditional frozen waffles, Eggo Grab & Go are individually wrapped, eliminating the need for extensive preparation or cooking immediately.

This unique packaging allows for on-the-go consumption – they can be enjoyed at room temperature, providing an instant breakfast or snack option. Alternatively, for those who prefer a warmer treat, they can be easily thawed in under an hour or quickly heated in a toaster, microwave, or air fryer. Crafted with real butter and free from artificial colors and flavors, Eggo Grab & Go waffles deliver a wholesome and delicious experience.

What are Eggo Grab & Go Waffles?

Eggo Grab & Go waffles are a convenient, individually wrapped breakfast option designed for those with active lifestyles. These Liege-style waffles distinguish themselves from traditional frozen waffles through their pre-packaged format, offering unparalleled ease and portability. Each waffle is sealed to maintain freshness, allowing consumers to enjoy a delicious breakfast or snack without the hassle of cooking immediately.

Made with real butter and notably absent of artificial colors and flavors, Eggo Grab & Go prioritizes quality ingredients. They are available in two appealing flavors: Buttery Maple and Strawberry, catering to diverse taste preferences. Their versatility is a key feature; they can be consumed at room temperature, quickly thawed, or heated using a toaster, microwave, or air fryer, adapting to individual preferences and time constraints.

Available Flavors

Eggo Grab & Go waffles currently delight consumers with a curated selection of two delicious flavors, designed to satisfy a variety of palates. The flagship flavor, Buttery Maple, delivers a classic waffle experience, infused with the rich, comforting taste of real butter and sweet maple notes. This flavor provides a familiar and satisfying breakfast or snack option for all ages.

For those seeking a fruity twist, Strawberry offers a vibrant and refreshing alternative. This flavor combines the traditional waffle texture with the bright, natural sweetness of strawberries, creating a delightful and flavorful experience. Both flavors share the commitment to quality ingredients, being made with real butter and containing no artificial colors or flavors, ensuring a wholesome and enjoyable treat. These individually wrapped waffles provide convenient and tasty options for on-the-go enjoyment.

Buttery Maple

Eggo Grab & Go Buttery Maple waffles represent a timeless breakfast favorite, conveniently packaged for a quick and satisfying experience. These Liege-style waffles are crafted with real butter, delivering a rich and authentic flavor that perfectly complements the sweet notes of maple. The individually wrapped format makes them ideal for busy mornings, school lunches, or a simple on-the-go snack.

Consumers consistently praise the classic taste and convenient portability of this flavor. Whether enjoyed at room temperature, quickly thawed, or warmed in a toaster, microwave, or air fryer, the Buttery Maple variety offers consistent quality and deliciousness. The absence of artificial colors and flavors further enhances its appeal, providing a wholesome option for families seeking a tasty and convenient breakfast solution. It’s a truly comforting and reliable choice!

Strawberry

Eggo Grab & Go Strawberry waffles provide a delightful fruity twist on a classic breakfast staple, offering a vibrant and flavorful experience for all ages. These individually wrapped Liege-style waffles are made with real butter and boast a natural strawberry sweetness, without any artificial colors or flavors. Their convenient packaging makes them perfect for busy mornings, quick snacks, or packing in lunchboxes.

The Strawberry flavor consistently receives positive feedback for its refreshing taste and portability. Enjoy them straight from the wrapper, thaw them in under an hour for a softer texture, or warm them up using a toaster, microwave, or air fryer to suit your preference. This variety offers a wholesome and delicious option for those seeking a convenient and fruity breakfast or snack, making it a family favorite!

Preparation Methods

Eggo Grab & Go waffles are incredibly versatile! Enjoy them at room temperature, quickly thaw them, or warm them up using a toaster, microwave, or air fryer.

Eating Eggo Grab & Go at Room Temperature

Eggo Grab & Go waffles are uniquely designed for on-the-go convenience, and a significant benefit is the ability to enjoy them straight from the package – no heating required! This makes them an ideal choice for busy mornings, quick snacks, or when you simply don’t have access to a microwave or toaster.

The waffles are formulated to maintain a palatable texture and flavor even at room temperature, ensuring a satisfying experience without compromising on taste. Each waffle is individually wrapped to preserve freshness and maintain its soft, enjoyable consistency.

This feature is particularly appealing for parents seeking a hassle-free breakfast or snack option for their children, or for individuals with fast-paced lifestyles who prioritize convenience. Simply unwrap and enjoy – it’s that easy!

Thawing Instructions

Eggo Grab & Go waffles can be quickly thawed for a softer, more pliable texture if you prefer not to eat them frozen or at room temperature. The thawing process is remarkably fast, designed to fit seamlessly into a busy schedule. Simply remove the desired number of waffles from their individual wrappers and place them on a plate or microwave-safe dish.

Allow the waffles to sit at room temperature for under an hour to thaw completely. This timeframe provides a convenient option for preparing breakfast ahead of time or having a quick snack ready when needed.

While thawing is not essential, it can enhance the overall eating experience for those who prefer a less firm texture. Remember to discard any thawed waffles that have been left at room temperature for an extended period.

Thawing Time

Determining the precise Eggo Grab & Go waffle thawing time is straightforward – it’s remarkably quick! These waffles are designed for convenience, and that extends to their thawing process. You can expect a complete thaw to occur in less than one hour when left at standard room temperature.

However, the actual thawing duration can vary slightly depending on the ambient temperature of your kitchen. Warmer environments will naturally expedite the process, while cooler temperatures may require a few extra minutes.

For optimal results, place the individually wrapped waffles on a plate. Checking periodically after 30 minutes will help you gauge their progress. A fully thawed waffle will be soft to the touch and easily pliable, ready for immediate enjoyment or further preparation.

Toaster Instructions

Enjoying a warm, crispy Eggo Grab & Go waffle straight from the toaster is a delightful experience! The process is simple and quick, perfect for a fast breakfast. Begin by removing the waffle from its individual wrapper. Then, insert the frozen waffle directly into your toaster slots.

Toasting time will vary depending on your toaster’s settings and desired level of crispness. We recommend starting with a medium setting and adjusting accordingly. Keep a close watch during the initial toasting cycle to prevent burning.

Generally, a single cycle on a medium setting yields a perfectly toasted waffle. For a more golden-brown and crunchy texture, you may add an additional short cycle. Always exercise caution when removing the hot waffle from the toaster!

Alternative Cooking Methods

Eggo Grab & Go waffles offer flexibility! Beyond the toaster, enjoy them warmed via microwave or air fryer for varied textures and quick preparation options.

Microwave Instructions

Microwaving Eggo Grab & Go waffles provides a speedy warming solution when a toaster isn’t available. For a single waffle, begin by removing it from its individual wrapper. Place the frozen waffle directly onto a microwave-safe plate. Initiate heating for approximately 30 to 45 seconds, observing closely.

If you’re preparing two Eggo Grab & Go waffles simultaneously, extend the microwaving time to 45 seconds to a full minute. Consistent monitoring is crucial to prevent overheating. After the initial heating period, carefully check the waffle’s temperature. If it hasn’t reached your desired warmth, continue microwaving in short, 10-second intervals until perfectly heated through. Remember that microwave power levels vary, so adjust timing accordingly for optimal results. Always exercise caution, as the waffle may be hot after microwaving.

Microwaving One Waffle

To microwave a single Eggo Grab & Go waffle, begin by carefully removing it from its protective wrapper. Place the frozen waffle directly onto a microwave-safe plate, ensuring it lies flat for even heating. Initiate the microwaving process, setting the timer for an initial duration of 30 to 45 seconds. This timeframe provides a good starting point, but individual microwave wattages may necessitate adjustments.

After the initial heating cycle, cautiously check the waffle’s temperature. If it’s not sufficiently warm to your liking, continue microwaving in incremental 10-second bursts. This prevents overheating and ensures a perfectly warmed waffle. Remember to always handle the waffle with care, as it may be hot to the touch following microwaving. Enjoy your quickly heated Eggo Grab & Go waffle!

Microwaving Two Waffles

For a double dose of Eggo Grab & Go goodness, you can conveniently microwave two waffles simultaneously. Begin by unwrapping both waffles and arranging them side-by-side on a microwave-safe plate, ensuring they aren’t overlapping. Initiate the microwaving process, setting the timer for a slightly extended duration of 45 seconds to 1 minute. This increased time accommodates the larger quantity and ensures both waffles reach a desirable warmth.

Following the initial heating cycle, carefully assess the temperature of both waffles. If they haven’t reached your preferred level of warmth, continue microwaving in short, 10-second intervals. This allows for precise temperature control and prevents potential overheating. Always exercise caution when handling the waffles, as they may be hot after microwaving. Enjoy!

Checking for Doneness

Determining the perfect level of warmth for your Eggo Grab & Go waffle is crucial for optimal enjoyment. After microwaving, or using any heating method, carefully remove the waffle from the appliance. Gently touch the surface to assess its temperature – it should be warm to the touch, but not scalding. A slight give when pressed indicates it’s heated through.

If the waffle still feels cold or firm, return it to the microwave or toaster for additional short bursts of heating, typically in 10-second increments. Remember, heating appliances vary, so adjust the timing accordingly. Always prioritize safety and exercise caution when handling a potentially hot waffle. A perfectly warmed Eggo Grab & Go is a delightful treat!

Air Fryer Instructions

For a delightfully crispy texture, the air fryer is an excellent choice for preparing your Eggo Grab & Go waffles. Begin by removing the waffle from its wrapper. Preheat your air fryer to 300 degrees Fahrenheit (approximately 150 degrees Celsius) to ensure even cooking. Once preheated, carefully place the frozen waffle directly on the air fryer rack or in the basket, ensuring it’s not overcrowded.

Cook for 2 to 3 minutes, checking periodically to prevent burning. The exact cooking time may vary depending on your specific air fryer model. Monitor closely for a golden-brown appearance and a satisfyingly crisp exterior. Enjoy your perfectly air-fried Eggo Grab & Go waffle immediately!

Air Fryer Temperature

Achieving the ideal crispy texture with your Eggo Grab & Go waffle in an air fryer hinges on setting the correct temperature. For optimal results, preheat your air fryer to 300 degrees Fahrenheit (that’s approximately 150 degrees Celsius). This moderate heat ensures the waffle cooks through evenly without burning the delicate pearl sugar coating.

Lower temperatures might result in a soggy waffle, while higher temperatures could lead to excessive browning or burning before the inside is adequately heated. Maintaining a consistent 300°F allows for a golden-brown exterior and a warm, fluffy interior. Remember to always refer to your air fryer’s manual for specific temperature guidelines, as models can vary.

Air Fryer Cooking Time

Once your air fryer is preheated to 300°F, it’s time to achieve that perfectly warmed Eggo Grab & Go waffle! Place the frozen waffle directly onto the air fryer rack or basket, ensuring it’s in a single layer for even cooking. A cooking time of 2 to 3 minutes is generally sufficient to heat the waffle through and create a delightful crispy texture.

However, cooking times can slightly vary depending on your specific air fryer model and the desired level of warmth. It’s always best to start with 2 minutes and check for doneness. If needed, add 30-second intervals until the waffle reaches your preferred temperature. Avoid overcrowding the air fryer for best results!

Safety Precautions

Always exercise caution, as the pearl sugar can become very hot after heating! Never leave appliances unattended, and ensure children are supervised during preparation.

Caution: Hot Pearl Sugar

A critical safety consideration when enjoying Eggo Grab & Go waffles is the potential for extremely hot pearl sugar. These delightful little sugar crystals, characteristic of Liege-style waffles, can reach scalding temperatures during the heating process, regardless of the chosen method – toaster, microwave, or air fryer.

This intense heat poses a burn risk, particularly to the mouth and throat. Therefore, it’s essential to allow the waffle to cool slightly before consumption. Exercise extra caution when serving these waffles to children, ensuring they understand the potential for hot sugar and allowing sufficient cooling time.

Always test a small portion before taking a full bite, and be mindful of the molten sugar that may be present. Prioritizing safety will ensure a pleasant and enjoyable breakfast experience with Eggo Grab & Go waffles.

Appliance Supervision

When preparing Eggo Grab & Go waffles using any heating appliance – toaster, microwave, or air fryer – consistent and attentive supervision is paramount. Never leave a heating appliance unattended while in operation. This precaution minimizes the risk of fire hazards and ensures safe operation of the equipment.

Each appliance functions differently, and monitoring the waffle during the heating process allows for adjustments as needed to prevent burning or uneven heating. Regularly inspect the appliance for any malfunctions or damage before each use.

Following the manufacturer’s instructions for your specific appliance is crucial for safe and effective waffle preparation. Prioritizing appliance supervision contributes to a secure and enjoyable breakfast experience with Eggo Grab & Go waffles.

Child Supervision

Preparing Eggo Grab & Go waffles requires diligent child supervision, especially when utilizing heating appliances. Children should never operate toasters, microwaves, or air fryers independently due to potential burn risks and appliance misuse. A responsible adult must oversee the entire process, from removing the waffle from its wrapper to serving it.

Caution must be exercised as the pearl sugar on the waffles can become exceptionally hot after heating. Ensure children understand the potential for burns and avoid immediate consumption post-heating. Maintaining a safe distance from the appliance during operation is also vital.

Prioritizing child supervision guarantees a secure and enjoyable breakfast experience with Eggo Grab & Go waffles, minimizing risks and fostering responsible kitchen habits.

Nutritional Information & Ingredients

Eggo Grab & Go waffles are crafted with real butter and notably contain no artificial colors or flavors, offering a tasty and convenient breakfast option.

Real Butter Content

Eggo Grab & Go waffles distinguish themselves within the frozen breakfast category through the inclusion of genuine butter in their formulation. This commitment to using real butter contributes significantly to the waffles’ appealing flavor profile and overall satisfying texture. Unlike some competing products that rely on artificial butter flavorings, Eggo prioritizes a more authentic taste experience for consumers.

The incorporation of real butter isn’t merely a marketing point; it’s a core element of the product’s identity, appealing to those seeking a more wholesome and flavorful breakfast option. This dedication to quality ingredients, specifically real butter, sets Eggo Grab & Go waffles apart and enhances their appeal to families and individuals alike, ensuring a delicious start to the day.

Absence of Artificial Colors & Flavors

Eggo Grab & Go waffles are formulated without the use of artificial colors or artificial flavors, aligning with a growing consumer preference for cleaner ingredient lists. This commitment reflects a dedication to providing a more natural breakfast option, appealing to parents and individuals mindful of what they consume. The absence of these artificial additives doesn’t compromise the waffles’ delicious taste; instead, Eggo relies on genuine ingredients to deliver a satisfying flavor experience.

By omitting artificial components, Eggo Grab & Go waffles cater to a health-conscious audience seeking simpler, more wholesome food choices. This focus on natural ingredients enhances the brand’s appeal and reinforces its position as a trusted breakfast provider for families seeking a convenient yet quality option, free from unnecessary additives.

Ingredient List (General)

While specific ingredient lists may vary slightly depending on the flavor (Buttery Maple or Strawberry), Eggo Grab & Go waffles generally include wheat flour, sugar, modified corn starch, baking powder, salt, and whey. Crucially, they contain real butter, contributing to their rich flavor profile. Other common ingredients encompass soybean oil, molasses, and natural flavors. The waffles also utilize ingredients like sodium stearoyl lactylate and sorbitol for texture and moisture retention.

Additionally, the Strawberry variety incorporates red 40 lake for color, while both flavors contain leavening agents and emulsifiers to ensure a light and fluffy texture. Consumers seeking a complete and precise ingredient breakdown should always refer to the packaging of their specific Eggo Grab & Go waffle product for the most accurate information.

Where to Buy Eggo Grab & Go

Eggo Grab & Go waffles are readily available both online through major retailers and at most local grocery stores for convenient purchase options!

Online Retailers

Eggo Grab & Go waffles can be conveniently purchased from a variety of online retailers, offering delivery directly to your doorstep. Popular options include major e-commerce platforms like Amazon, Walmart.com, and Instacart. These sites frequently feature competitive pricing and often offer subscription services for regular deliveries, ensuring you never run out of your favorite breakfast treat.

Postmates also lists Eggo Grab & Go waffles, providing another avenue for quick and easy ordering. Checking each retailer’s website is recommended to compare prices, availability, and shipping costs. Online purchases provide a hassle-free way to stock up, especially for those with limited access to physical grocery stores or busy schedules. Don’t forget to look for potential online-exclusive deals and promotions!

Local Grocery Stores

Eggo Grab & Go waffles are widely available in most major grocery store chains across the country. You can typically find them in the frozen breakfast aisle, alongside other waffle varieties and breakfast pastries. Popular stores carrying these convenient waffles include Kroger, Safeway, Albertsons, and Publix. Smaller, regional grocery stores may also stock them, depending on local demand and distribution agreements.

MARTINS is one example of a grocery store that carries these waffles; Checking your local store’s website or app is a great way to confirm availability before making a trip. Availability can vary, so it’s always a good idea to call ahead if you’re specifically looking for a particular flavor. Stock up during sales and promotions to save on your favorite on-the-go breakfast!

Categories
Instructions

farberware coffee maker instructions

Farberware Coffee Maker Instructions: A Comprehensive Guide

Welcome! This guide provides detailed instructions for various Farberware coffee makers, encompassing models like the FSCM200M, FW61100042831, and FW12-100024366.

It covers setup, brewing, cleaning, and troubleshooting, ensuring optimal performance and longevity of your appliance. Access specific model manuals online for tailored guidance.

Understanding Your Farberware Coffee Maker Model

Farberware offers a diverse range of coffee makers, from classic carafes like the FSCM200M to programmable 12-cup models (FCP240) and even those compatible with K-Cups, such as the FW61100042831. Identifying your specific model is crucial for accessing the correct instructions and ensuring optimal brewing.

The model number is typically located on the underside of the unit or within the water reservoir. Knowing this number allows you to download the precise user manual from the Farberware website or access relevant support resources. Different models feature varying functionalities – some include a “Keep Warm” function, while others boast programmable timers for automated brewing.

Older models, like the 5-Cup Coffee Maker (103743), may have simpler operation compared to newer, more advanced machines. Stainless steel coffee urns require specific attention to cleaning procedures as outlined in their respective manuals. Understanding these distinctions will streamline your coffee-making experience and maximize the lifespan of your Farberware appliance.

Identifying Key Components

Farberware coffee makers, regardless of model, share several key components. The water reservoir, often removable, holds the water for brewing. The filter basket accommodates either a paper filter or a reusable filter for holding coffee grounds. A crucial element is the carafe, designed to collect the brewed coffee – some models utilize glass carafes, while others employ stainless steel.

Programmable models feature a control panel with buttons for power, programming, and brew selection. The heating plate keeps the brewed coffee warm after the brewing cycle completes. Single-serve brewers incorporate a K-Cup holder (for compatible models) to accommodate single-serve coffee pods.

The lid secures the water reservoir and brewing components. Familiarizing yourself with these parts – as detailed in your model’s manual – is essential for proper operation and maintenance. Understanding the function of each component will aid in troubleshooting and ensure a consistently delicious cup of coffee. Regular inspection of these parts is recommended.

Initial Setup and Preparation

Before your first brew, proper setup is crucial for optimal performance. Begin by carefully unpacking your Farberware coffee maker and removing all packaging materials. Place the coffee maker on a stable, level surface, away from water sources and heat. Inspect all components for any damage that may have occurred during shipping.

Ensure the carafe is clean and free of debris. Locate the water reservoir and familiarize yourself with its fill lines. Before using, wash the reservoir, filter basket, and carafe with warm, soapy water. Rinse thoroughly to remove any residue.

Plug the coffee maker into a grounded electrical outlet. It’s recommended to run a full brewing cycle with water only (see “First-Time Use: Cleaning Before Brewing”) to flush out any manufacturing residue. Refer to your specific model’s manual for detailed diagrams and instructions tailored to your Farberware coffee maker. This initial preparation ensures a clean and flavorful first cup.

First-Time Use: Cleaning Before Brewing

Prior to brewing your first pot of coffee, a thorough cleaning cycle is essential to remove any residual manufacturing oils or particles. Fill the water reservoir to its maximum capacity with fresh, clean water. Do not add coffee grounds or a filter during this process.

Place the empty carafe securely on the warming plate. Ensure the filter basket is in place, even though it will remain empty. Turn on the coffee maker and initiate a full brewing cycle as if you were making coffee. Allow the entire cycle to complete, discarding the brewed water once finished.

Repeat this process at least once, and ideally twice, to ensure a completely clean system. This initial flush helps guarantee the purest coffee flavor in subsequent brews. Some manuals suggest this step, particularly for models like the FCP240. This simple step significantly improves the taste and longevity of your Farberware coffee maker.

Water Reservoir and Filter Basket Instructions

The water reservoir is designed for easy filling and accurate measurement. Most Farberware models feature clearly marked water level indicators, corresponding to cup measurements. Always use fresh, cold, filtered water for the best-tasting coffee. Avoid overfilling beyond the maximum line, as this can cause overflow during brewing.

The filter basket accommodates standard paper filters – typically cone-shaped or basket-style, depending on your model. Ensure the filter is properly seated within the basket to prevent grounds from escaping into the brewed coffee. For optimal flavor, rinse the paper filter with water before adding coffee grounds; this removes any papery taste.

Some models, like the Side by Side, are compatible with both ground coffee and K-Cups. When using K-Cups, a separate adapter is required, which fits securely into the filter basket area. Always refer to your specific model’s manual for detailed instructions regarding filter types and K-Cup adapter usage.

Brewing Coffee: Step-by-Step Guide

Step 1: Fill the water reservoir with the desired amount of fresh, cold water, referencing the cup markings. Step 2: Insert a paper filter into the filter basket, rinsing it beforehand for a cleaner taste. Step 3: Add ground coffee to the filter, using approximately one tablespoon per cup, adjusting to your preference.

Step 4: Ensure the carafe is securely placed on the warming plate. Step 5: For standard brewing, press the power button to initiate the brewing cycle. Programmable models may require selecting a brew strength or size. Step 6: Allow the coffee maker to complete the brewing process; do not interrupt it.

Step 7: Once brewing is finished, the coffee maker will automatically switch to the ‘Keep Warm’ function (if enabled). Carefully pour and enjoy! For K-Cup brewing, insert the K-Cup into the adapter and follow similar steps, ensuring proper adapter placement; Always consult your model’s manual for specific brewing instructions.

Programming the Coffee Maker (For Programmable Models)

Step 1: Press the “Program” or “Set” button – the specific label varies by model. This initiates the programming mode. Step 2: Use the “Hour” and “Minute” buttons to set the desired start time for brewing. Ensure the AM/PM indicator is correct.

Step 3: Some models allow you to select brew strength or the number of cups to brew during programming. Adjust these settings as needed. Step 4: Confirm your settings by pressing the “Program” or “Set” button again. The coffee maker will typically display a confirmation indicator, like a lit “Auto” light.

Step 5: Ensure the water reservoir is filled and the filter basket contains coffee grounds before programming. The coffee maker will automatically begin brewing at the programmed time. To cancel programmed brewing, press the “Program” or “Cancel” button. Refer to your specific model’s manual for detailed programming instructions and button functions.

Using the Keep Warm Function

Activating Keep Warm: Most Farberware coffee makers automatically activate the “Keep Warm” function after the brewing cycle completes. This feature maintains the coffee’s temperature for a set period, typically around two hours. Some models require manually pressing a “Keep Warm” button to engage this function.

Temperature Maintenance: The “Keep Warm” function doesn’t reheat the coffee; it maintains the existing temperature. Over extended periods, coffee flavor can degrade even with the keep-warm feature. Duration: The keep-warm duration varies by model. Consult your user manual for the specific time limit.

Automatic Shut-Off: For safety, the keep-warm function will automatically shut off after the designated time. Carafe Removal: Removing the carafe during the keep-warm cycle will usually deactivate the function. Note: Prolonged use of the keep-warm function may slightly alter the coffee’s taste. Regular cleaning is essential for optimal performance.

Brewing with K-Cups (For Compatible Models)

K-Cup Compatibility: Certain Farberware models, like the Side by Side (FW61100042831), offer both traditional drip brewing and single-serve K-Cup functionality. Ensure your model specifically supports K-Cups before proceeding.

K-Cup Adapter: You’ll need a K-Cup adapter, often included with the coffee maker. Insert the adapter into the designated single-serve brewing area. Pod Insertion: Place a K-Cup pod into the adapter. Ensure it’s properly seated.

Water Level: For single-serve brewing, use the appropriate water level markings for a single cup. Brewing Process: Select the single-serve brewing option (if applicable) and initiate the brew cycle. Cleaning: After each K-Cup use, remove and discard the used pod and rinse the adapter. Regular cleaning prevents residue buildup.

Cleaning and Maintenance: Daily Routine

Daily Cleaning is Crucial: After each use, promptly discard used coffee grounds and the paper filter. Rinse the filter basket and carafe with warm, soapy water. Thoroughly dry all components before reassembling.

Carafe Care: Hand wash the carafe to prevent scratching or damage. Avoid abrasive cleaners. Inspect the carafe regularly for cracks or chips; replace if necessary.

Exterior Wipe-Down: Wipe the exterior of the coffee maker with a damp cloth to remove spills and splatters. Avoid getting water inside the unit.

Removable Parts: Most Farberware models feature removable parts for easier cleaning. Consult your manual for specific disassembly instructions. Regular Inspection: Check the spray head for clogs and clean as needed.

Importance of Cleanliness: Consistent daily cleaning prevents mineral buildup and ensures optimal coffee flavor. A clean coffee maker extends its lifespan and delivers a better brewing experience. Refer to your manual for detailed cleaning guidance specific to your model.

Descaling Your Farberware Coffee Maker

Why Descale? Over time, mineral deposits from water accumulate inside your Farberware coffee maker, affecting brewing performance and coffee taste. Descaling removes these deposits, restoring optimal functionality.

Descaling Solution: Use a commercially available descaling solution specifically designed for coffee makers, or a mixture of equal parts white vinegar and water. Follow Solution Instructions: Always adhere to the descaling solution’s instructions for proper dilution and usage.

Descaling Process: Fill the water reservoir with the descaling solution. Run a full brewing cycle without coffee grounds. Repeat with fresh water 2-3 times to rinse thoroughly.

Frequency: Descale your coffee maker every 3-6 months, depending on water hardness. Areas with hard water require more frequent descaling. Refer to Manual: Consult your specific model’s manual for detailed descaling instructions.

Importance of Rinsing: Complete rinsing is vital to remove any residual descaling solution, ensuring your coffee doesn’t taste unpleasant. Regular descaling extends the life of your appliance.

Troubleshooting Common Issues

Coffee Maker Not Turning On: Ensure the unit is properly plugged into a functioning outlet. Check the power cord for damage. If the issue persists, consult the user manual or contact Farberware support.

Coffee Brewing Too Slowly: Mineral buildup (scaling) is a common cause. Descale your coffee maker following the instructions in the manual. Also, ensure the filter basket isn’t overfilled.

Coffee Tastes Weak or Bitter: Use the correct coffee-to-water ratio. Ensure fresh, quality coffee grounds are used. A dirty coffee maker can also affect taste; clean thoroughly.

Water Leaking: Check the carafe is properly positioned. Inspect the water reservoir for cracks or damage. Ensure all parts are correctly assembled.

Error Codes: Refer to the “Error Codes and Their Meanings” section of this guide or your model’s manual for specific code explanations and solutions. Manual is Key: Always consult your specific model’s manual for detailed troubleshooting steps.

Error Codes and Their Meanings

Understanding Error Signals: Farberware coffee makers utilize error codes to indicate specific malfunctions. These codes help pinpoint the issue for quicker resolution. Always refer to your specific model’s manual, as codes vary.

Common Error Codes (Examples): While specifics differ, some common indicators include “E1” or “Error 1” often signaling a descaling need. “E2” or “Error 2” might indicate a water reservoir issue – either empty or improperly seated.

“E3” or “Error 3” could point to a temperature sensor problem, requiring professional service. Some models display “CL” or “Clean” to prompt descaling. A flashing error code often signifies an ongoing issue.

Resetting the System: After addressing the issue (e.g., descaling), unplug the coffee maker for several minutes, then plug it back in to reset the system. If the error persists, document the code and contact Farberware customer support.

Manual is Essential: The most accurate error code definitions are found within your coffee maker’s user manual. Ignoring error codes can lead to further damage.

Replacing the Carafe (If Applicable)

Identifying Carafe Compatibility: If your Farberware coffee maker’s carafe breaks, finding a replacement is crucial. Not all carafes are universally compatible; model-specific replacements ensure proper fit and function.

Where to Purchase: Replacements can be found on the Farberware website, major online retailers (like Amazon or Walmart), and appliance parts stores. Always verify the part number before ordering.

Checking Model Numbers: Locate your coffee maker’s model number (usually on the bottom or back) and search for a carafe specifically designed for that model. Using an incorrect carafe can lead to spills or improper brewing.

Glass vs. Thermal: Determine if your original carafe was glass or thermal. Replacing a glass carafe with a thermal one (or vice versa) may require adjustments or be incompatible.

Safety First: When handling a broken carafe, exercise extreme caution to avoid cuts. Dispose of broken glass responsibly. Ensure the new carafe is securely seated on the warming plate before use.

Safety Precautions and Warnings

Electrical Safety: Always ensure the coffee maker is plugged into a grounded outlet. Never immerse the appliance, cord, or plug in water or other liquids. Avoid using extension cords.

Hot Surfaces: The carafe, warming plate, and certain internal components become extremely hot during and after brewing. Use caution and allow sufficient cooling time before handling. Avoid touching hot surfaces directly; use handles or pot holders.

Supervision Required: Close supervision is necessary when the coffee maker is used near children. Keep the appliance out of reach of children to prevent burns or injuries.

Proper Usage: Only use the coffee maker for its intended purpose – brewing coffee. Do not use it to heat other liquids. Follow all instructions outlined in the user manual.

Cord Safety: Regularly inspect the power cord for damage. If the cord is damaged, it must be replaced by a qualified technician to avoid electrical hazards. Never operate the appliance with a damaged cord.

Unplug When Not In Use: Always unplug the coffee maker from the outlet when not in use and before cleaning. This prevents accidental operation and potential hazards.

Finding Your Specific Model’s Manual Online

Farberware provides comprehensive resources for locating your coffee maker’s specific user manual online. Start by visiting the official Farberware website. Navigate to the “Support” or “Customer Service” section, often found at the bottom of the homepage.

Look for a “Manuals” or “Downloads” area. You’ll typically be prompted to enter your model number – crucial for accurate results. This number is usually located on the underside of the coffee maker or on the original packaging.

If you’re unable to find the manual on the Farberware website, explore third-party manual databases. Websites dedicated to appliance manuals often host a wide range of documents, including those for older models.

Keywords for Searching: When using search engines, include terms like “Farberware coffee maker manual,” followed by your specific model number (e.g., “Farberware FSCM200M manual”).

PDF Format: Most manuals are available in PDF format, requiring a PDF reader (like Adobe Acrobat Reader) to view and download. Ensure your device has a compatible reader installed.

Having the correct manual ensures safe and efficient operation.

Farberware Customer Support Contact Information

For direct assistance with your Farberware coffee maker, several support channels are available. While specific contact details can evolve, here’s a comprehensive overview of how to reach Farberware customer service.

Website Support: Begin by visiting the official Farberware website. Look for a “Contact Us” or “Customer Support” section. This often includes a frequently asked questions (FAQ) database addressing common issues and troubleshooting steps.

Email Support: Farberware typically offers email support. Check the website for the dedicated customer service email address. Be prepared to provide your model number and a detailed description of your issue.

Phone Support: A customer service phone line is usually available during business hours. The phone number can be found on the Farberware website or in your product’s documentation.

Social Media: Farberware may also provide support through social media channels like Facebook or Twitter. However, response times may vary.

Important Note: Have your model number and proof of purchase readily available when contacting support. This will expedite the assistance process.

Prompt support ensures a satisfying coffee experience.

Categories
Instructions

instruction for putting away fishing tackle crossword clue

Article Plan: Instruction for Putting Away Fishing Tackle Crossword Clue

This article dissects the crossword clue “Instruction for Putting Away Fishing Tackle,” exploring potential 13-letter solutions like “Tackle Box” and “Gear Storage․”
We’ll delve into solving techniques, related clues (like “Tackle Box Item”), and comprehensive fishing tackle storage options for enthusiasts․

Crossword puzzles often present a delightful challenge, particularly when clues tap into specialized knowledge․ The clue “Instruction for Putting Away Fishing Tackle” is a prime example, requiring both crossword-solving skills and familiarity with angling equipment․ This seemingly simple phrase can unlock a variety of answers, depending on the puzzle’s context and the solver’s approach․

Successfully navigating this clue demands understanding common fishing storage solutions․ Is the answer a specific container, a broader organizational method, or even a piece of equipment designed for storage? This article will guide you through the process of deciphering this clue, exploring potential solutions, and enhancing your overall crossword prowess․ We’ll also touch upon related clues and the world of fishing tackle organization․

Understanding Crossword Clues & Fishing Terminology

Crossword clues aren’t always straightforward; they often employ wordplay, synonyms, and indirect references․ “Instruction for Putting Away Fishing Tackle” is likely a definition-based clue, seeking a noun that describes a method or item used for storage․ Recognizing this is key․

Crucially, understanding fishing terminology is vital․ “Tackle” encompasses all the gear used in fishing – rods, reels, lures, lines, and more․ Effective storage solutions are designed to protect and organize this equipment․ Common terms include “tackle boxes,” “tackle bags,” and “rod racks․” Familiarity with these terms significantly narrows down potential answers․ Knowing that anglers prioritize accessibility and protection of their gear informs the likely solution․

The Core Clue: “Instruction for Putting Away Fishing Tackle”

The clue “Instruction for Putting Away Fishing Tackle” presents a challenge requiring both lexical and conceptual understanding․ It’s not asking how to put tackle away, but what facilitates that action․ The phrasing suggests a noun – a container or system designed for organization․

Considering the 13-letter constraint, the possibilities become more focused․ The clue leans towards a general term rather than a specific item within the storage solution․ It’s about the overarching method of keeping gear organized․ The word “instruction” subtly hints at a system or a designated place, rather than a spontaneous act․ Therefore, the answer must represent a deliberate approach to tackle management․

Common Crossword Solving Techniques

When tackling this clue, several techniques prove invaluable․ Start by examining intersecting letters – these provide crucial anchors․ Consider common crossword patterns; shorter words often unlock longer ones․ Think about synonyms for “storage” or “organization” within a fishing context․

Break down the clue’s components․ “Instruction” might suggest a label or a system․ “Putting away” implies containment․ Don’t fixate on overly specific fishing terms initially; a broader approach is often more fruitful․ Utilize the length constraint (13 letters) to eliminate possibilities․ Online crossword solvers can be helpful, but attempt to deduce the answer first to enhance your skills․ Remember, context is key!

Utilizing Crossword Solver Tools

Crossword solver websites, like the-crossword-solver․com, are powerful aids when facing challenging clues such as “Instruction for Putting Away Fishing Tackle․” Input the known letters and the clue’s length (13 in this case) to generate potential solutions․ These tools leverage extensive crossword databases, identifying words that fit the pattern․

However, reliance solely on solvers can hinder skill development․ Use them strategically – after attempting to solve the clue independently․ Explore multiple solver options, as results can vary․ Be mindful of potential ambiguity; solvers may offer several possibilities․ Verify the solution’s relevance to fishing terminology and the overall crossword theme․ Remember, solvers are tools, not replacements for logical deduction․

Analyzing the Clue’s Length & Context (13 Letters)

The clue “Instruction for Putting Away Fishing Tackle” specifies a 13-letter answer, immediately narrowing the possibilities․ This length is crucial; it eliminates countless words․ Considering the context – fishing and organization – directs our thinking towards tackle storage solutions․ Common terms related to this theme include containers, racks, and bags․

Furthermore, the phrasing “instruction for” suggests a noun representing a method or item used to store tackle․ This isn’t about the act of storing, but the means of doing so․ Knowing this, we can prioritize potential answers that describe storage objects rather than actions․ The 13-letter constraint, combined with the contextual hint, significantly aids the solving process․

Possible Solutions & Answers

Several answers fit the 13-letter clue, including “Tackle Box,” “Tackle Bag,” “Rod Rack,” and “Gear Storage․” These options represent common methods for organizing fishing equipment․

Solution 1: Tackle Box

The “Tackle Box” is a frequently cited solution for the 13-letter crossword clue․ It’s a classic and widely recognized method for storing fishing tackle, appearing often in related crossword puzzles as an item within a tackle box itself! These boxes come in diverse materials and configurations, ranging from simple plastic containers to rugged, multi-layered systems․

They typically feature trays, compartments, and dividers designed to neatly organize lures, hooks, weights, and other essential fishing accessories․ A tackle box provides protection from the elements and facilitates easy access to gear during a fishing trip․ Its portability makes it ideal for various fishing scenarios, from shore fishing to boat excursions․ Considering its prevalence and direct relevance, “Tackle Box” is a strong contender for the correct answer․

Solution 2: Tackle Bag

Another viable solution to the “Instruction for Putting Away Fishing Tackle” crossword clue, fitting the 13-letter requirement, is “Tackle Bag․” Unlike the more structured tackle box, a tackle bag offers greater versatility and portability․ These bags are often constructed from durable, water-resistant materials, making them suitable for various weather conditions․

They typically feature multiple pockets, compartments, and sometimes even removable trays, allowing anglers to customize their storage setup․ Tackle bags are particularly favored by those who prefer a lighter, more mobile option, or who engage in fishing activities that require frequent movement․ The convenience and adaptability of a tackle bag make it a popular choice, and a logical answer to the clue․

Solution 3: Rod Rack

While seemingly less direct, “Rod Rack” presents a plausible solution to the “Instruction for Putting Away Fishing Tackle” crossword clue, satisfying the 13-letter constraint․ Though primarily for rod storage, a comprehensive tackle system often includes a rod rack as an integral part of overall organization․

Rod racks protect valuable fishing rods from damage, preventing breakage and tangling․ They come in various forms – wall-mounted, freestanding, or even portable – catering to different space and mobility needs․ Considering the clue’s broad phrasing (“putting away”), encompassing all tackle, a rod rack logically fits․ It’s a method of storing a significant component of one’s fishing gear, making it a clever, if slightly indirect, answer for crossword solvers․

Solution 4: Gear Storage

“Gear Storage” emerges as a strong contender for the 13-letter “Instruction for Putting Away Fishing Tackle” crossword clue, representing a broad, encompassing solution․ It directly addresses the core concept of organizing and securing all types of fishing equipment, not just items confined to a box or bag․

Modern anglers often employ dedicated gear storage systems, ranging from garage shelving to customized compartments within boats․ This solution acknowledges the holistic approach to tackle management, recognizing that effective organization extends beyond traditional containers․ The phrase is descriptive and accurately reflects the action implied by the clue, making it a highly probable answer for crossword enthusiasts seeking a logical and complete fit․

Exploring Related Crossword Clues

Related clues, such as “Tackle Box Item,” “Fishing Lure,” and “Angler’s Tool,” frequently appear in puzzles alongside tackle storage questions, testing a solver’s fishing knowledge․

Related Clue 1: Tackle Box Item

“Tackle Box Item” is a common companion clue, directly linked to the core puzzle of organizing fishing gear․ This clue often seeks specific contents within a tackle box, like lures, hooks, weights, or floats․ Solving this requires understanding what an angler would store for a successful fishing trip․

Crossword constructors frequently use this connection to reinforce the theme of tackle management․ Answers could range from “LURE” or “HOOK” to more specific items like “FLY” (referencing fly fishing tackle)․ The length of the answer will, of course, dictate the possibilities․ Recognizing this relationship – that a tackle box contains items – is a valuable strategy when tackling related puzzles․ It’s a classic example of how crossword clues build upon each other․

Related Clue 2: Fishing Lure

“Fishing Lure” represents a direct component of the broader “instruction for putting away fishing tackle” theme․ Lures, being essential gear, necessitate storage solutions – linking back to the original clue․ Crossword puzzles often leverage this connection, testing a solver’s knowledge of angling terminology․

Answers to “Fishing Lure” clues can vary widely, from common terms like “SPINNER” or “PLUG” to more specialized lures like “JIG” or “FLY․” The clue might also be phrased indirectly, describing the lure’s function or appearance․ Successfully identifying a lure as an answer reinforces the understanding that tackle requires organization․ This clue highlights the practical need for tackle boxes, bags, or racks to manage these essential fishing components effectively․

Related Clue 3: Angler’s Tool

“Angler’s Tool” serves as a broad, yet relevant, related clue to “instruction for putting away fishing tackle․” It encompasses a vast array of items – pliers, line cutters, hook removers, and more – all requiring dedicated storage․ This connection emphasizes the comprehensive nature of tackle organization, extending beyond just rods and reels․

Crossword answers for “Angler’s Tool” might include “PLIERS,” “KNIFE,” or “HOOKSETTER․” The clue’s ambiguity often tests a solver’s familiarity with fishing equipment․ Recognizing these tools as components of a larger tackle system reinforces the need for efficient storage solutions․ A well-organized angler ensures quick access to essential tools, improving their fishing experience and highlighting the importance of proper tackle management․

Related Clue 4: Fishhook Attachment

“Fishhook Attachment” directly links to tackle organization because these small components – swivels, snaps, leaders, and split rings – are notoriously easy to lose if not properly contained․ This clue highlights the need for segmented storage within a tackle box or bag, preventing tangling and ensuring quick access during a fishing trip․

Possible crossword answers include “SNAP,” “SWIVEL,” or “LEADER․” Successfully solving this clue demonstrates an understanding of terminal tackle, essential for connecting line to hook and lure․ Efficient storage of these attachments is crucial; small compartments or dedicated boxes prevent them from becoming a disorganized mess, ultimately saving time and frustration on the water․

Deep Dive into Fishing Tackle Storage

Effective storage ranges from classic tackle boxes and versatile tackle bags to space-saving rod racks and customizable DIY solutions, ensuring gear is protected and accessible․

Tackle Boxes: Types & Features

Tackle boxes are foundational for organizing fishing gear, coming in diverse types to suit various angling styles․ Traditional hard-shell tackle boxes offer robust protection and often feature multiple trays for compartmentalized storage of lures, hooks, and weights․ These are ideal for boat or shore fishing where durability is key․

Soft-sided tackle bags provide a lighter, more portable alternative, often incorporating external pockets for quick access to frequently used items․ Modular tackle systems allow anglers to customize their storage with add-on trays and compartments․ Features like waterproof construction and corrosion-resistant materials extend the lifespan of both the box and its contents․ Rugged tackle boxes, as highlighted in recent gear guides, are essential for keeping lures and accessories secure․

Tackle Bags: Versatility & Portability

Tackle bags excel in versatility and portability, offering a convenient solution for anglers on the move․ Unlike rigid tackle boxes, bags are typically lighter and easier to carry, making them perfect for hiking to remote fishing spots or kayak fishing․ Many feature padded shoulder straps and comfortable handles for extended transport․

Their soft construction allows them to conform to various spaces, fitting easily into car trunks or boat storage compartments․ Internal and external pockets provide organized storage for a wide range of tackle, from lures and line to tools and accessories․ Modern tackle bags often incorporate waterproof materials and durable zippers to protect gear from the elements, ensuring accessibility and organization wherever the fishing adventure leads․

Rod Racks: Protecting Your Investment

Rod racks are crucial for safeguarding your valuable fishing rods from damage․ Leaning rods against walls or haphazardly storing them can lead to breakage, especially sensitive guides and tips․ A dedicated rod rack provides secure, organized storage, preventing accidental impacts and preserving rod integrity․

Available in various materials – wood, metal, and plastic – and designs, rod racks cater to different needs and spaces․ Wall-mounted racks save floor space, while freestanding models offer portability․ Proper rod storage minimizes stress on the rod blank, extending its lifespan and maintaining optimal performance․ Investing in a quality rod rack is a proactive step in protecting your fishing investment and ensuring years of enjoyable angling․

DIY Fishing Tackle Storage Solutions

For the resourceful angler, creating custom fishing tackle storage doesn’t require a hefty investment․ Repurposing existing containers – plastic bins, toolboxes, and even old shelving units – can yield effective and affordable solutions․ Simple modifications, like adding dividers or foam inserts, customize spaces for specific lures, hooks, and accessories․

DIY projects can range from building a dedicated tackle station in a garage to crafting portable storage boxes from readily available materials․ Utilizing wall space with pegboards and hooks maximizes organization․ These personalized solutions not only keep tackle tidy but also reflect an angler’s individual needs and preferences, offering a cost-effective alternative to commercially available options․

Advanced Crossword Solving Strategies

Mastering ambiguous clues, like “Instruction for Putting Away Fishing Tackle,” requires considering synonyms, known letters, and potential wordplay․ Utilize crossword solver tools strategically for assistance․

Identifying Ambiguous Clues

The clue “Instruction for Putting Away Fishing Tackle” presents a classic example of crossword ambiguity․ The phrasing doesn’t immediately point to a single, obvious answer; Is it referring to a physical instruction manual, or the act of storage itself? This is where experienced solvers excel․

Ambiguity often arises from broad wording․ “Instruction” could be interpreted in multiple ways, and “putting away” lacks specificity․ Recognizing this vagueness is the first step․ Consider that crossword constructors intentionally craft clues to be challenging․ They rely on double meanings and indirect references․

Furthermore, the length constraint (13 letters in this case) significantly narrows the possibilities, but doesn’t eliminate the need for careful consideration of various interpretations․ Don’t fixate on the first idea that comes to mind; explore alternative meanings of each word within the clue․

Using Known Letters to Narrow Down Options

Once you’ve filled in intersecting clues, any revealed letters within the “Instruction for Putting Away Fishing Tackle” answer space become invaluable․ Each confirmed letter drastically reduces the potential solutions․ For a 13-letter word, even a single correctly placed letter can eliminate dozens of possibilities․

Consider common letter patterns․ For example, if the third letter is a ‘C’, you can immediately discard options that don’t fit․ Utilize online crossword solver tools – many allow you to input known letters and the word length to generate a refined list of potential answers․

Don’t underestimate the power of vowel placement․ Vowels are frequently used in English words, and knowing their position can significantly narrow your search․ Systematically test potential letters, keeping in mind common prefixes and suffixes related to fishing and storage․

Considering Synonyms & Related Terms

When tackling the “Instruction for Putting Away Fishing Tackle” clue, broaden your thinking beyond literal interpretations․ Consider synonyms for “storage,” “organization,” or even components within tackle storage․ Terms like “container,” “holder,” or “receptacle” might lead you to the correct answer․

Think about the function of tackle storage․ Is it about protecting gear? Transporting it? Keeping it accessible? Related terms like “preservation” or “portability” could spark the right association․ Explore words connected to fishing itself – “angler’s gear” or “fishing equipment” might offer clues․

Remember that crossword clues often employ indirect wording․ The answer isn’t always the most obvious term; it’s the word that best fits the clue’s clever phrasing and the given letter count․

Resources for Crossword Enthusiasts

Utilize online crossword solvers and dictionaries for assistance․ Explore fishing terminology glossaries to expand your vocabulary and tackle challenging clues effectively․

Online Crossword Solver Websites

Numerous websites are invaluable tools for crossword puzzle enthusiasts, particularly when facing a tricky clue like “Instruction for Putting Away Fishing Tackle․” The-crossword-solver․com stands out, offering a dedicated space to input clues and known letters, rapidly generating potential solutions․ These solvers excel at identifying possibilities based on word length – crucial for a 13-letter answer․

Other helpful platforms include those with extensive crossword databases, allowing users to search for previously used clues and answers․ Inputting partial solutions can significantly narrow down options․ Remember that these tools are aids, not replacements for critical thinking; verifying answers against the puzzle’s overall context remains essential․ They are especially useful when ambiguous clues present a challenge․

Crossword Puzzle Dictionaries

Dedicated crossword puzzle dictionaries are powerful resources, going beyond standard definitions to include common crossword entries and synonyms․ These dictionaries often list words by letter count, making it easier to pinpoint potential answers for clues like “Instruction for Putting Away Fishing Tackle” (13 letters)․ They frequently include variations and less common usages, which crossword constructors often exploit․

Unlike general dictionaries, crossword dictionaries prioritize words frequently appearing in puzzles․ They can reveal patterns and preferred vocabulary․ While not always directly providing the answer, they offer a wealth of related terms – “tackle box,” “gear storage,” or “rod rack” – that can spark inspiration and help deduce the correct solution․ They are invaluable for understanding the puzzle’s logic․

Fishing Terminology Glossaries

For crossword solvers encountering clues like “Instruction for Putting Away Fishing Tackle,” fishing terminology glossaries are essential․ These resources define specialized terms that might not appear in general dictionaries, providing context crucial for solving․ Understanding terms related to tackle – boxes, bags, racks, and gear – expands your potential answer pool․

Glossaries clarify the nuances of angling vocabulary, helping you differentiate between similar items․ Knowing the specific function of a “tackle box” versus a “tackle bag” can be the key to unlocking the 13-letter solution․ They also reveal synonyms and related concepts, aiding in brainstorming․ Online glossaries are readily accessible and often include images, further enhancing comprehension and puzzle-solving success․

Mastering the Clue & Organizing Your Tackle

Successfully deciphering the “Instruction for Putting Away Fishing Tackle” crossword clue requires a blend of linguistic skill and angling knowledge․ By employing techniques like analyzing clue length, considering synonyms, and utilizing crossword solver tools, even ambiguous clues become solvable․ Remember, the 13-letter answer points towards storage solutions – “Tackle Box,” “Gear Storage,” or similar․

Beyond the puzzle, this exploration highlights the importance of organized tackle․ Whether opting for a traditional tackle box, a versatile tackle bag, or a space-saving rod rack, efficient storage enhances the fishing experience․ A well-organized angler is a more successful angler, and a prepared mind conquers both crosswords and the open water!

Categories
Instructions

10’x10 gazebo assembly instructions

Assembling your 10×10 gazebo requires careful attention to the instruction manual and provided assembly video for a smooth, successful build.

This guide ensures proper installation, maximizing enjoyment of your outdoor space, and creating a relaxing haven for all seasons.

Importance of Following Instructions

Following the instruction manual meticulously is paramount during your 10×10 gazebo assembly. Deviating from the provided steps can lead to structural instability, misaligned components, and ultimately, a compromised and potentially unsafe structure.

The manual serves as a detailed roadmap, outlining the correct sequence of operations and specifying the appropriate hardware for each connection. Ignoring these guidelines increases the risk of damaging parts, requiring rework, or even rendering the gazebo unusable.

Furthermore, the assembly video complements the written instructions, offering visual clarity and reinforcing proper techniques. Adhering to both resources ensures a secure, aesthetically pleasing, and long-lasting outdoor addition to your property. Prioritize safety and accuracy by embracing the provided guidance.

Safety Precautions During Assembly

Prioritize safety throughout your 10×10 gazebo assembly. Always work in a clear, spacious area, free from obstructions and potential hazards. Wear appropriate safety gear, including gloves and eye protection, to prevent injuries from sharp edges or flying debris.

When lifting or maneuvering heavier components, enlist the help of another person to avoid strain or accidental drops. Ensure the ground is level and stable before beginning construction.

Be mindful of overhead power lines and maintain a safe distance. Carefully inspect all parts for damage before installation. If using power tools, follow manufacturer’s safety guidelines. A secure and stable gazebo begins with a cautious and well-prepared assembly process.

Unboxing and Parts Inventory

Carefully unpack all components and compare them against the parts list in your instruction manual to ensure everything is present before starting.

Checking the Package Contents

Begin by thoroughly inspecting all boxes for any signs of damage during shipping. Carefully open each package and lay out the contents on a protected surface – a drop cloth or cardboard is ideal to prevent scratches.

Cross-reference each item with the detailed parts list included in your instruction manual. This list will typically include quantities and potentially diagrams for easy identification.

Pay close attention to smaller hardware components like screws, bolts, and washers; these are easily misplaced. Verify that all necessary hardware is present and accounted for. Note any discrepancies immediately and contact the manufacturer or retailer if parts are missing. A complete inventory upfront saves significant frustration later in the assembly process.

Identifying All Components (Referencing Manual)

Utilize the instruction manual’s parts diagram as your primary reference. Each component is typically labeled with a specific code (e.g., A, B, C, etc.). Familiarize yourself with these codes and their corresponding parts before starting the assembly.

Identify the larger structural elements first – the base frame tubes, vertical support posts, and upper frame rails. Then, move on to the roof components, including roof supports, panels (hardtop or fabric), and railings.

Don’t overlook the canopy and optional mosquito netting. Confirm you can distinguish between different screw and bolt sizes, as the manual will specify where each is used. Accurate component identification is crucial for a seamless build.

Hardware Identification (Screws, Bolts, etc.)

Carefully review the instruction manual’s hardware section; it details each screw, bolt, and fastener type. These are often categorized by length and head style. Separate and organize all hardware into labeled containers to prevent confusion during assembly.

Pay close attention to differences – a seemingly minor variation can impact structural integrity. Identify the roof railing plugs, ensuring you have the correct quantity. The manual will specify where each hardware piece is used, referencing component codes.

Confirm you have all necessary items before proceeding. Missing hardware can halt progress, so double-check against the parts list.

Foundation Preparation

Select a level location for your gazebo, ensuring adequate space. Leveling the ground is crucial for stability, or consider building a permanent foundation for longevity.

Choosing a Suitable Location

Selecting the right spot for your 10×10 gazebo is paramount for long-term enjoyment and stability. Consider proximity to your house for convenient access, but also think about prevailing winds and sun exposure. A location sheltered from strong gusts will enhance the gazebo’s durability.

Ensure ample clearance around the perimeter – at least six feet is recommended – to prevent collisions and allow for easy maintenance. Check for underground utilities before digging, and avoid placing the gazebo directly under trees to minimize debris accumulation. A relatively flat surface is ideal, reducing the amount of leveling required later in the assembly process. Think about the view from your gazebo; a pleasant outlook will maximize your relaxation!

Leveling the Ground

Achieving a perfectly level foundation is crucial for a stable and aesthetically pleasing gazebo. Begin by removing any grass or vegetation from the designated area. Use a long level and straight edge to identify high and low spots. For minor imperfections, you can redistribute soil to create a more even surface.

For significant slopes, consider using gravel or sand as a leveling base. Compact the material thoroughly to prevent settling. Regularly check your progress with the level, ensuring it spans across multiple points. A level base prevents wobbling, distributes weight evenly, and extends the gazebo’s lifespan. Don’t rush this step; a solid foundation is the key to a successful assembly!

Optional: Building a Permanent Foundation

For enhanced stability and longevity, consider constructing a permanent foundation for your 10×10 gazebo. This typically involves a concrete slab or a gravel-filled base with a perimeter foundation wall. Local building codes may require permits, so check regulations beforehand.

A concrete slab provides the most solid base, ensuring the gazebo remains level and secure in all weather conditions. Alternatively, a well-compacted gravel base with a treated lumber perimeter offers good drainage and stability. Ensure the foundation extends beyond the gazebo’s footprint for optimal support. Proper planning and execution of a permanent foundation significantly increase the gazebo’s durability.

Frame Assembly ⏤ Step-by-Step

Begin by assembling the base frame, then securely attach the vertical support posts, referencing Figure 1. Finally, install the upper frame rails for stability.

Assembling the Base Frame

Begin the assembly process by carefully laying out all base frame components on a protected surface to prevent scratches. Connect frame tubes, typically designated as ‘2’, to the roof connector ‘A’, following the instruction manual’s diagrams precisely.

Ensure proper alignment before fully tightening the hardware – screws or bolts – provided. Double-check that all corners are square; slight adjustments now will prevent significant issues later.

The base frame forms the foundation of your gazebo, so meticulous attention to detail is crucial. Securely fasten each connection point, verifying stability before proceeding to the next step. A solid base guarantees a robust and long-lasting structure.

Attaching Vertical Support Posts

Following the instruction manual, carefully position the vertical support posts – often labeled ‘E’ – onto the assembled base frame corners. Align the pre-drilled holes in the posts with those in the frame, ensuring a flush and secure fit.

Utilize the appropriate hardware, typically bolts, and washers to fasten each post firmly to the base. Do not fully tighten at this stage; allow for slight adjustments as you attach subsequent posts;

Confirm that all posts are plumb, meaning perfectly vertical, using a level. Once satisfied with the alignment, progressively tighten all bolts, creating a stable and upright support structure for the gazebo’s upper frame.

Installing Upper Frame Rails

Referencing Figure 1 in the instruction manual, connect the upper frame rails – often designated as ‘F1’ – to the tops of the installed vertical support posts. Align the rails carefully, ensuring the pre-drilled holes correspond with those on the posts.

Securely fasten the rails using the specified bolts and washers, again avoiding full tightening initially. This allows for adjustments during the process. Work systematically around the gazebo frame, connecting each rail to its adjacent posts.

Once all rails are in place, double-check alignment and then progressively tighten all bolts to create a rigid and level upper frame structure, ready for roof support installation.

Roof Structure Installation

Installing the roof involves attaching supports, then panels – either hardtop or fabric – and finally securing the roof railings for stability.

Attaching Roof Supports

Carefully position the roof supports according to the assembly instructions, typically connecting them to the upper frame rails. Ensure proper alignment before fully tightening any hardware. Utilize the provided screws or bolts, referencing the parts list to confirm correct sizing and type.

Pay close attention to the orientation of each support; incorrect placement can compromise the roof’s structural integrity. The manual will illustrate the precise angles and connections needed for a secure fit.

Double-check that all supports are level and evenly spaced before proceeding to the next step. This foundational step is crucial for a stable and weather-resistant roof structure. A properly supported roof will withstand wind and rain effectively.

Installing Roof Panels (Hardtop or Fabric)

Depending on your gazebo model, carefully lift and position either the hardtop roof panels or the fabric canopy onto the installed roof supports. For hardtop panels, align the pre-drilled holes and secure with the appropriate bolts, tightening gradually in a crisscross pattern for even pressure.

If installing a fabric canopy, drape it over the frame, ensuring even distribution. Attach the canopy using the provided hooks, ties, or Velcro straps, securing it firmly to the roof supports.

Refer to the instruction manual for specific attachment points and techniques. Proper installation prevents sagging and ensures weather resistance. A taut, well-secured roof is essential for long-lasting enjoyment.

Securing Roof Railings

Once the roof panels are in place, attach the roof railings to the upper frame, utilizing the pre-drilled holes. Insert roof railing plugs into both the top and bottom of the upper roof railings – typically four plugs per rail – to create a finished look and enhance stability.

Secure the railings with the provided screws or bolts, ensuring they are tightened firmly but not over-tightened to avoid damaging the frame. Consistent railing attachment is crucial for structural integrity and prevents potential wobbling.

Double-check all connections, referencing the instruction manual for correct placement and torque specifications. Properly secured railings contribute to the overall safety and longevity of your gazebo.

Canopy Installation

Attaching the canopy fabric involves carefully draping it over the frame, ensuring proper tension for a clean appearance and weather resistance.

Utilize the designated fastening methods – often Velcro or ties – to secure the canopy firmly to the gazebo structure.

Attaching the Canopy Fabric

Carefully unroll the canopy fabric, inspecting it for any damage incurred during shipping or storage. Position the canopy centrally over the gazebo frame, ensuring equal overhang on all sides for a balanced aesthetic and optimal weather protection.

Begin attaching the canopy at the corners, utilizing the provided hooks, loops, or Velcro straps. Work your way around the perimeter, gradually securing the fabric to the frame. Maintain consistent tension as you go, avoiding excessive stretching or sagging.

Pay close attention to the orientation of the canopy, as some fabrics may have a specific side intended for facing upwards. Ensure all attachment points are firmly fastened to prevent the canopy from detaching during windy conditions. A properly installed canopy will enhance the gazebo’s appearance and functionality.

Ensuring Proper Canopy Tension

Achieving correct canopy tension is crucial for preventing water pooling, minimizing wind resistance, and extending the lifespan of your gazebo canopy. After initial attachment, systematically assess the fabric’s tautness across the entire surface.

Look for any areas exhibiting excessive slack or uneven stretching. Utilize the adjustable straps or tensioning cords integrated into the canopy design to fine-tune the tightness. Tighten gradually and evenly, avoiding over-tensioning, which could damage the fabric or frame.

A well-tensioned canopy should exhibit a smooth, drum-like appearance, with minimal wrinkles or sags. Regularly check and readjust the tension, especially after periods of heavy rain or strong winds, to maintain optimal performance and structural integrity.

Canopy Fastening Methods

Securely attaching the canopy is paramount for stability and weather resistance. Most 10×10 gazebos utilize a combination of hook-and-loop fasteners, bungee cords, and sometimes, dedicated canopy clips. Begin by aligning the canopy edges with the frame, ensuring even distribution.

Attach the canopy using the provided fasteners, starting at opposite corners to maintain balanced tension. Bungee cords should be stretched and hooked securely, avoiding overextension. Regularly inspect these connections for wear or loosening.

For added security, consider reinforcing critical attachment points with additional fasteners. Proper fastening prevents flapping in the wind and safeguards against potential damage during inclement weather, ensuring long-lasting enjoyment of your outdoor structure.

Mosquito Netting Installation (Optional)

Attaching netting to the gazebo frame provides a bug-free zone; ensure a secure fit and familiarize yourself with the zipper operation for easy access.

Attaching Netting to the Frame

Carefully drape the mosquito netting over the assembled gazebo frame, ensuring even distribution around the perimeter. Most netting systems utilize hook-and-loop fasteners, strategically placed along the frame’s vertical posts and upper rails.

Begin by securing the top corners of the netting, then work your way down, gently stretching the fabric to minimize slack and prevent gaps. Pay close attention to doorways, where netting often overlaps or features zippered openings for convenient entry and exit.

Ensure each fastener is firmly attached, providing a tight seal against insects. Some models may include additional ties or cords for enhanced security, particularly in windy conditions. Regularly inspect the netting attachments for wear and tear, and replace any damaged fasteners promptly.

Ensuring a Secure Fit

Achieving a secure fit with the mosquito netting is crucial for effective insect protection. After initial attachment, meticulously inspect the entire perimeter, identifying any areas where gaps or looseness exist. Utilize the adjustable straps or cords provided to tighten the netting, creating a taut barrier.

Pay particular attention to the base of the netting, where it meets the gazebo frame. Ensure it’s firmly secured to prevent insects from crawling underneath. For models with zippered doorways, test the zipper’s functionality, confirming a complete and seamless closure.

Regularly check the netting’s tension, especially after exposure to wind or rain, and readjust as needed. A properly fitted netting system will significantly enhance your outdoor enjoyment, providing a comfortable and pest-free environment.

Netting Zipper Operation

Proper operation of the mosquito netting zippers is essential for convenient access and maintaining a secure enclosure. Before first use, gently test each zipper along all lengths, ensuring smooth and unobstructed movement. Avoid forcing the zipper; if resistance is encountered, inspect for any fabric caught within the teeth.

Regularly lubricate the zippers with a silicone-based spray or zipper lubricant to maintain optimal performance and prevent corrosion. When opening or closing, hold the fabric taut near the zipper to minimize strain.

Inspect the zipper pulls for damage and replace if necessary. A functioning zipper system guarantees easy entry and exit while effectively keeping insects out, maximizing your comfort and enjoyment within the gazebo.

Final Checks and Adjustments

Ensure all bolts and screws are tightly secured, verifying the gazebo’s stability and addressing any misalignments for safe, long-lasting enjoyment.

Tightening All Bolts and Screws

Thoroughly inspect every bolt and screw utilized during the gazebo assembly process. Begin with the base frame, systematically tightening each fastener to ensure a solid foundation. Proceed upwards, securing the vertical support posts and upper frame rails with consistent pressure.

Pay close attention to the roof structure, meticulously tightening bolts connecting roof supports and panels. Do not overtighten, as this could potentially damage the components. A properly tightened structure guarantees stability and prevents loosening over time.

Re-check all connections after initial tightening, as settling may occur. Consistent tightening, following the instruction manual, is crucial for a safe and durable gazebo.

Checking for Stability

Post-assembly, a comprehensive stability check is paramount for safety. Gently apply pressure to each support post, assessing for any wobble or movement. Ensure the base frame sits firmly and evenly on the prepared ground or foundation.

Carefully examine the roof structure, verifying that all panels and railings are securely fastened and exhibit no signs of instability. Walk around the gazebo, applying moderate force to different sections to identify potential weak points.

If any instability is detected, revisit the instruction manual and re-tighten connections. A stable gazebo, built according to the assembly guidelines, provides a secure and enjoyable outdoor experience.

Addressing Any Misalignments

During assembly, minor misalignments can occur. Don’t force connections; instead, loosen adjacent bolts to allow for adjustments. Gently reposition components to achieve proper alignment before re-tightening fasteners.

If roof panels don’t sit flush, check the underlying frame for squareness. Utilize a level to identify and correct any unevenness in the foundation or support posts. Refer to the instruction manual’s diagrams for visual guidance.

Persistent misalignments may indicate a missing or incorrectly installed part. Double-check the parts inventory and retrace your steps. Correcting these issues ensures structural integrity and a professional finish.

Categories
Instructions

canon 5d mark iv instruction manual

Canon 5D Mark IV Instruction Manual: A Comprehensive Guide

This guide offers a simplified setup and usage experience for your Canon 5D Mark IV, featuring clear instructions and helpful illustrations for optimal performance․

Welcome! This comprehensive manual is designed to help you understand and utilize all the features and benefits of your newly activated Canon 5D Mark IV․

Welcome to the world of professional photography with the Canon 5D Mark IV, a full-frame DSLR renowned for its exceptional image quality, robust build, and versatile features․ This camera is designed for both enthusiasts and professionals seeking a powerful tool to capture stunning photos and videos․

This instruction manual serves as your comprehensive guide to unlocking the full potential of your 5D Mark IV․ We’ll walk you through every aspect, from initial setup and understanding the camera’s controls to mastering advanced shooting techniques and utilizing its extensive menu system․

Whether you’re a seasoned photographer or just beginning your journey, this manual will provide clear, concise instructions and helpful tips to elevate your photography․ Prepare to explore the capabilities of this remarkable camera and create images that inspire!

Unboxing and Initial Setup

Congratulations on your new Canon 5D Mark IV! Let’s begin with unboxing and initial setup to get you shooting quickly․ Carefully unpack the camera and verify all package contents are present, referencing the included documentation․ This ensures you have all necessary components․

The first step is battery charging․ Connect the battery charger to a power outlet and insert the battery․ Allow it to charge fully before installation․ Once charged, insert the battery into the camera’s battery compartment, ensuring proper alignment․

Next, insert a compatible memory card into the card slot․ Power on the camera and follow the on-screen prompts to set the language, date, and time․ You’re now ready to begin exploring your 5D Mark IV!

Package Contents Verification

Before proceeding, carefully verify all items are present within the Canon 5D Mark IV packaging․ Your package should include the 5D Mark IV camera body, a battery pack, a battery charger, a power cable for the charger, a wide strap, and interface cables․

Additionally, you should find a comprehensive instruction manual, warranty card, and various software CDs or download information․ Inspect each item for any signs of damage during shipping․

If any components are missing or appear damaged, immediately contact your retailer or Canon support for assistance․ Accurate verification ensures a smooth start to your photographic journey with the 5D Mark IV․

Battery Charging and Installation

Prior to first use, fully charge the supplied battery pack (LP-E6N) using the provided battery charger (LC-E6)․ Connect the power cable to the charger and a suitable power outlet․ The charging indicator will illuminate, turning off once complete․

To install the battery, locate the battery compartment on the bottom of the camera․ Slide the battery pack into the compartment until it clicks securely into place․ Ensure proper polarity alignment․

To remove the battery, press the release latch within the compartment and slide the battery out․ Always handle the battery with care and avoid exposing it to extreme temperatures․

Understanding the Camera Body & Controls

The Canon 5D Mark IV boasts a robust and ergonomically designed body, offering intuitive control for photographers of all levels․ Familiarizing yourself with the camera’s layout is crucial for efficient operation․

Key areas include the front, rear, and top panels, each housing essential controls․ The front panel features the lens release button and depth-of-field preview lever․ The rear panel hosts the LCD screen, buttons for navigating menus, and the control dial․

The top panel provides access to shooting mode selection, the main dial, and the shutter button․ Understanding these controls unlocks the camera’s full potential․

Front Panel Controls & Functions

The Canon 5D Mark IV’s front panel is streamlined for essential operations․ The prominent lens release button allows for quick lens changes, crucial for versatility in various shooting scenarios․ Adjacent to this, the depth-of-field preview lever provides a visual representation of the image’s depth of field at the selected aperture․

Additionally, you’ll find the focus selection button, enabling switching between autofocus modes․ These controls are strategically positioned for easy access while maintaining a secure grip on the camera․ Mastering these functions streamlines your workflow and enhances your shooting experience․

Rear Panel Controls & Functions

The rear panel of the Canon 5D Mark IV houses the majority of its control functions․ The prominent LCD screen serves as a viewfinder and display for menu navigation and image review․ Surrounding the screen are buttons for accessing key settings like white balance, drive mode, and picture style․

The multi-controller allows for precise AF point selection and menu navigation․ The ‘SET’ button confirms selections, while the Quick Control button provides direct access to frequently used settings․ The INFO button toggles between different information displays on the LCD․ Familiarizing yourself with these controls unlocks the camera’s full potential․

Top Panel Controls & Functions

The Canon 5D Mark IV’s top panel provides essential controls for immediate adjustments during shooting․ The main power switch, shutter button, and mode dial are centrally located for easy access․ The mode dial allows quick selection between Auto, Program, Aperture Priority, Shutter Priority, Manual, and various creative modes․

Additional controls include the exposure compensation dial, offering quick adjustments to brightness, and the AF point selection button․ The video record button initiates 4K or Full HD video recording․ Understanding these top panel functions streamlines your workflow and ensures you never miss a crucial moment․

Menu System Navigation

The Canon 5D Mark IV features an intuitive menu system, accessed via the MENU button on the rear panel․ The system is divided into several tabs – Shooting, AF, Exposure, Picture Quality, and more – for organized access to settings․ The Quick Control Screen provides a visual overview of frequently used settings, allowing for rapid adjustments without navigating through menus․

Customization is key; users can personalize the menu structure and assign functions to buttons for a tailored shooting experience․ Mastering menu navigation unlocks the camera’s full potential, enabling precise control over image quality and shooting parameters․

Quick Control Screen Overview

The Quick Control Screen, activated by pressing the ‘Q’ button, offers a streamlined interface for adjusting essential shooting settings․ It displays key parameters like shooting mode, aperture, shutter speed, ISO, AF mode, and white balance, all visually represented on the LCD screen․

Navigating the screen is simple using the rear dial and cross keys․ Directly modify settings without diving into the full menu system, saving valuable time during shoots․ This screen provides a real-time preview of how changes impact your image, enhancing efficiency and creative control․

Menu Structure and Customization

The Canon 5D Mark IV’s menu system is organized into several tabs – Shooting, AF, Exposure, Picture Quality, Playback, and Setup – for intuitive navigation․ Each tab contains numerous settings allowing for extensive camera customization․ My Menu is a particularly useful feature, enabling you to store frequently used settings for quick access․

Personalize your camera by registering custom functions, tailoring button assignments, and creating user-defined shooting modes․ Menu display options can also be adjusted for clarity and ease of use․ Explore these settings to optimize the 5D Mark IV to perfectly match your shooting style and preferences․

Shooting Modes Explained

The Canon 5D Mark IV offers a versatile range of shooting modes to suit various photographic situations․ Auto modes, like Scene Intelligent Auto, simplify shooting by automatically selecting optimal settings based on the scene․ Creative Zone modes provide more control, including Program (P), Aperture Priority (Av), Shutter Priority (Tv), and Manual (M)․

These modes allow you to adjust specific settings while the camera manages others․ Custom shooting modes, or User Defined Modes, let you save your preferred settings combinations for instant recall․ Experiment with each mode to understand how they impact your images and find what best suits your creative vision․

Auto Modes (Scene Intelligent Auto, etc․)

Canon’s Auto modes are designed for simplicity, ideal for beginners or quick snapshots․ Scene Intelligent Auto intelligently analyzes the scene – portraits, landscapes, sports, and more – and automatically selects the most appropriate settings․ This mode optimizes exposure, white balance, and picture style for excellent results with minimal effort․

Other auto options include Portrait, Landscape, Close-up, Sports, and Night modes, each tailored to specific shooting scenarios․ These pre-set modes offer a convenient way to capture high-quality images without manual adjustments, letting you focus on composition and capturing the moment․

Creative Zone Modes (Program, Aperture Priority, Shutter Priority, Manual)

The Creative Zone unlocks full control over your photography․ Program (P) mode allows the camera to select both aperture and shutter speed, while you retain control over other settings like ISO and white balance․ Aperture Priority (Av) lets you choose the aperture, influencing depth of field, with the camera setting the shutter speed․

Shutter Priority (Tv) allows you to control shutter speed, freezing or blurring motion, while the camera adjusts the aperture․ Manual (M) mode grants complete control over both aperture and shutter speed, offering ultimate creative freedom․ Mastering these modes is key to developing your photographic style․

Custom Shooting Modes (User Defined Modes)

Canon’s Custom Shooting Modes, designated as C1, C2, and C3, empower you to save and recall frequently used camera settings combinations․ This feature streamlines your workflow, eliminating the need to repeatedly adjust settings for specific shooting scenarios․ You can register settings like ISO, white balance, picture style, and autofocus modes․

To utilize these modes, first configure your desired settings in any of the Creative Zone modes․ Then, access the menu and register these settings to one of the C modes․ Quickly access these personalized settings via the mode dial, enhancing efficiency and consistency in your photography․

Autofocus System Deep Dive

The Canon 5D Mark IV boasts a sophisticated 61-point autofocus system, delivering exceptional precision and tracking capabilities․ Understanding its nuances is crucial for capturing sharp, well-focused images․ AF Point Selection Modes allow you to manually choose individual focus points, ideal for static subjects requiring precise placement․

Furthermore, the camera offers AF Area Modes like Single-Point, Zone, Large Zone, and Automatic Selection․ Zone AF is excellent for moving subjects within a defined area, while Automatic Selection intelligently chooses focus points based on the scene․ Mastering these modes unlocks the full potential of the camera’s autofocus performance․

AF Point Selection Modes

The Canon 5D Mark IV provides several AF Point Selection Modes, granting photographers granular control over focus․ Single-Point AF allows precise selection of a single focus point, perfect for stationary subjects demanding pinpoint accuracy․ AF Point Expand utilizes the selected point and surrounding points for increased tracking sensitivity․

Additionally, Zone AF divides the frame into zones, enabling focus on subjects within a chosen area․ Large Zone AF expands the zone size for faster tracking of more erratic movement․ Finally, Automatic Selection AF lets the camera intelligently choose focus points, ideal for unpredictable scenes․ Experimenting with these modes unlocks optimal autofocus performance․

AF Area Modes (Single-Point, Zone, Large Zone, Automatic Selection)

Canon’s 5D Mark IV offers distinct AF Area Modes to suit diverse shooting scenarios․ Single-Point AF focuses on a precisely selected point, ideal for static subjects requiring sharp detail․ Zone AF utilizes a pre-defined zone, beneficial for subjects moving within a limited area․

Large Zone AF expands the zone for quicker tracking of faster-moving subjects, while Automatic Selection AF empowers the camera to intelligently identify and track the subject․ Understanding these modes allows photographers to optimize autofocus performance, ensuring consistently sharp and well-focused images in various conditions․

Metering Modes and Exposure Control

The Canon 5D Mark IV provides several Metering Modes for accurate exposure assessment․ Evaluative Metering analyzes the entire scene, ideal for general photography․ Partial Metering focuses on approximately 6․5% of the frame, useful for backlit subjects․

Spot Metering measures a very small area (approximately 2․8%), perfect for precise exposure control in challenging lighting․ Center-Weighted Average Metering prioritizes the center of the frame while considering the entire scene․ Mastering these modes allows photographers to achieve optimal exposure, capturing images with balanced brightness and detail․

Evaluative Metering

Evaluative Metering, Canon’s default mode, is a sophisticated system analyzing the entire scene to determine optimal exposure․ It considers brightness, contrast, color distribution, and even subject recognition․ This mode excels in a wide range of shooting conditions, delivering well-exposed images with minimal user intervention․

The 5D Mark IV’s intelligent algorithm assesses light from approximately 150,000 pixels․ It’s particularly effective for general photography, landscapes, and portraits․ While reliable, understanding its limitations – potential underexposure with strong backlighting – is crucial for achieving desired results․

Partial Metering

Partial Metering on the Canon 5D Mark IV analyzes light from a roughly 6․5% area of the image frame, centered around the active focus point․ This mode offers greater control than Evaluative Metering, particularly when dealing with high-contrast scenes or strong backlighting․ It’s ideal for subjects that don’t fill the entire frame․

Unlike Spot Metering, Partial Metering covers a slightly larger area, providing a bit more leeway․ Photographers often use it to accurately expose specific elements within a scene, like a portrait subject’s face, while ignoring brighter or darker surroundings; Careful focus point placement is essential for precise exposure․

Spot Metering & Center-Weighted Average Metering

Spot Metering on the Canon 5D Mark IV precisely measures light from a very small area – approximately 2․8% of the frame – centered on the active focus point․ This is best for highly specific exposure control, like reading light from a single, crucial element․

Center-Weighted Average Metering, conversely, prioritizes the center of the frame while still considering the entire scene․ It assigns more weight to the central area, gradually decreasing towards the edges․ This mode is useful for general photography where the main subject is centrally located, offering a balance between accuracy and simplicity․

Image Quality Settings & File Formats

The Canon 5D Mark IV offers versatile image quality settings, primarily revolving around RAW versus JPEG formats․ RAW files capture all data recorded by the sensor, providing maximum flexibility for post-processing adjustments – ideal for professional workflows․ JPEG files are compressed, resulting in smaller file sizes but with some data loss․

Image Size options allow you to select the resolution, impacting detail and file size․ Compression settings within JPEG further control file size versus image quality․ Choosing the right combination depends on your intended use – high resolution and minimal compression for prints, smaller sizes for web sharing․

RAW vs․ JPEG – Understanding the Differences

RAW files, from the Canon 5D Mark IV, are essentially unprocessed data directly from the image sensor, offering unparalleled editing latitude․ Think of them as digital negatives, preserving all captured information․ JPEG files, conversely, are processed and compressed by the camera, reducing file size but discarding some data․

This compression results in a ready-to-use image, but limits post-processing flexibility․ RAW’s larger file size demands more storage and processing power, while JPEG’s convenience is ideal for quick sharing․ Professionals often favor RAW for critical work, while casual users may prefer JPEG’s simplicity․

Image Size and Compression Options

The Canon 5D Mark IV offers diverse image size and compression settings, impacting both file size and image detail․ Larger sizes (e․g․, 5760 x 3840) capture more information, ideal for large prints or extensive cropping, but create bigger files․ Smaller sizes are suitable for web use or situations where storage is limited․

Compression options include RAW, JPEG Fine, and JPEG Normal․ RAW preserves maximum data, while JPEG Fine offers high quality with moderate compression․ JPEG Normal prioritizes smaller file sizes with increased compression․ Carefully consider your needs to balance quality and storage efficiency․

Video Recording Features

The Canon 5D Mark IV excels in video capabilities, offering both 4K and Full HD recording options․ 4K recording delivers exceptional detail and clarity, perfect for professional projects or future-proofing your footage․ Full HD remains a versatile choice for various applications, providing excellent quality at a smaller file size․

Settings customization is extensive, allowing control over frame rates, bitrates, and audio levels․ Manual controls provide precise exposure and focus adjustments․ Explore the menu to optimize settings for your specific shooting scenario, ensuring professional-looking video results․

4K Video Recording Settings

For 4K recording, the Canon 5D Mark IV offers several key settings to master․ Resolution is fixed at 3840 x 2160․ Frame rates include 24p, 25p, and 30p, catering to different cinematic styles and broadcast standards․ Bitrate options impact file size and quality; higher bitrates deliver superior detail․

Color Space can be set to Rec․ 709 for standard video or Canon Log for greater flexibility in post-production color grading․ Audio can be recorded internally or via an external microphone․ Careful consideration of these settings ensures optimal 4K video quality tailored to your project’s needs․

Full HD Video Recording Settings

The Canon 5D Mark IV excels in Full HD recording, offering versatile settings․ Resolution is 1920 x 1080․ Frame rates are extensive, including 24p, 25p, 30p, 50p, and 60p, providing options for slow motion and smooth motion․ IPB and ALL-I compression options affect file size and editing workflow․ ALL-I offers easier editing, while IPB provides smaller file sizes․

Audio can be recorded internally or externally․ Manual control over exposure and focus is crucial for professional results․ Experimenting with these settings allows you to achieve the desired look and feel for your Full HD video projects․

Connectivity & Transferring Images

The Canon 5D Mark IV offers several connectivity options for seamless image transfer․ Wi-Fi functionality, paired with the Canon Camera Connect app, enables wireless transfer to smartphones and tablets for quick sharing․ USB connection provides a reliable method for transferring images to computers․

Direct transfer to cloud services is also possible through the app․ Utilizing a high-speed USB cable ensures faster data transfer rates․ Regularly backing up your images is recommended to prevent data loss․ Explore these options to find the workflow that best suits your needs․

Wi-Fi Functionality & Canon Camera Connect App

The Canon 5D Mark IV’s built-in Wi-Fi allows for wireless communication with smartphones, tablets, and computers․ Download the Canon Camera Connect app (available for iOS and Android) to establish a connection․ This app facilitates image browsing, selection, and transfer directly to your mobile device․

You can also control the camera remotely via the app, including triggering the shutter and adjusting settings․ Secure Wi-Fi connections are crucial for data protection․ Ensure your camera and device are on the same network․ Explore the app’s features for streamlined image sharing and remote control capabilities․

USB Connection & Data Transfer

Connecting your Canon 5D Mark IV to a computer via USB enables fast and reliable data transfer․ Use a high-quality USB cable for optimal performance․ Upon connection, the camera may appear as a storage device, allowing direct file copying․ Alternatively, utilize Canon’s Digital Photo Professional (DPP) software for advanced image management․

DPP offers features like RAW image processing, batch renaming, and image organization․ Ensure the camera is powered on during the transfer process․ Safely eject the camera from your computer after completion to prevent data corruption․ Regularly back up your images to multiple locations for data security․

Troubleshooting Common Issues

Encountering problems? Check the battery charge and card capacity first․ If the camera freezes, try resetting it via the menu or removing the battery․ For autofocus issues, ensure the lens is properly attached and the AF settings are appropriate for your subject․ Image quality concerns often stem from incorrect settings – review resolution and file format choices․

Connectivity problems? Verify USB cable connections and software compatibility․ If errors persist, consult Canon’s online support resources or contact customer service․ Remember to regularly update the camera’s firmware for optimal performance and bug fixes․ Refer to the full manual for detailed solutions․

Categories
Instructions

book instructions

Article Plan: Book Instructions

Crafting effective book instructions demands a structured plan, encompassing audience understanding, scope definition, and meticulous organization—a roadmap for impactful writing and clarity.

Book instructions represent a unique writing challenge, demanding precision and clarity to guide readers through a process or understanding of a subject. Unlike narrative writing, the primary goal isn’t entertainment, but effective knowledge transfer. A well-crafted set of instructions empowers users to achieve desired outcomes independently.

The foundation of successful book instructions lies in a robust outline, serving as a blueprint for content organization. This ensures a logical flow, preventing confusion and maximizing comprehension. Considering the target audience’s existing knowledge is crucial; instructions should neither oversimplify nor overwhelm. Ultimately, impactful book instructions bridge the gap between concept and execution, fostering confidence and success in the reader.

Understanding Your Target Audience

Effective book instructions hinge on deeply understanding who will be using them. Consider their age and reading level – complex jargon will hinder a novice, while oversimplification insults an expert. Assess their prior knowledge; avoid explaining fundamentals already grasped, but patiently introduce new concepts.

Experience levels matter too. A seasoned professional requires concise guidance, whereas a beginner needs detailed, step-by-step explanations. Anticipate potential stumbling blocks based on common user errors. Tailoring language, complexity, and detail to the audience ensures instructions are accessible, engaging, and ultimately, successful in achieving their intended purpose.

Age and Reading Level

Determining the age and reading level of your intended audience is paramount. Younger audiences necessitate simpler language, shorter sentences, and abundant visuals. Conversely, adult learners can handle more complex terminology and abstract concepts. Analyze readability scores to ensure alignment with the target demographic’s capabilities.

Avoid assuming prior knowledge based solely on age. A technically-inclined teenager might grasp advanced concepts faster than some adults. Prioritize clarity and conciseness, regardless. Use age-appropriate examples and analogies to enhance comprehension. Regularly review and revise instructions based on feedback from representative users within the target age group.

Prior Knowledge and Experience

Assess your audience’s existing knowledge base. Are they beginners or seasoned professionals? Instructions for novices require detailed explanations of fundamental concepts, while experienced users benefit from concise, targeted guidance. Avoid jargon or technical terms without providing clear definitions.

Consider their practical experience. Have they used similar tools or techniques before? Build upon existing skills, rather than starting from scratch. Acknowledge potential knowledge gaps and address them proactively. Offer optional sections for advanced users seeking deeper understanding. Tailor the complexity of instructions to match their anticipated level of expertise.

Defining the Scope of the Book

Clearly delineate the boundaries of your book’s content. What specific tasks or concepts will it cover, and equally important, what will it exclude? A well-defined scope prevents scope creep and ensures a focused, manageable project. Establish core subject matter – the central theme or skill the book aims to teach.

Articulate specific, measurable goals and objectives. What should readers be able to do after completing the book? These objectives guide content creation and provide a benchmark for evaluating success. A focused scope enhances clarity and maximizes the book’s impact on the target audience.

Core Subject Matter

Identify the central theme or skill your book will address. This forms the foundation of all content. Is it a practical guide to software usage, a historical analysis, or a fictional narrative exploring specific themes? Precisely defining this core ensures consistency.

The core subject matter dictates the level of detail and complexity. A beginner’s guide requires simpler explanations than an advanced manual. Consider the overarching narrative or argument. Every chapter, section, and instruction should directly contribute to exploring and explaining this central focus, maintaining a cohesive and purposeful structure.

Specific Goals and Objectives

Clearly articulate what readers will know or be able to do after completing your book. Are you aiming to teach a new skill, impart knowledge, or inspire a particular viewpoint? These objectives guide content selection and structure.

Objectives should be measurable. Instead of “understand the concept,” aim for “apply the concept to solve three practical problems.” Define specific learning outcomes for each chapter. This ensures a focused and purposeful learning experience, aligning instructions with desired results and maximizing the book’s effectiveness for the intended audience.

Structuring the Book: Overall Organization

A well-structured book enhances comprehension and engagement. Consider a logical progression – perhaps chronological, problem-solution, or simple-to-complex. Divide the content into distinct parts or sections, each addressing a major theme or aspect of the subject matter.

Think of your book as a journey. Each section should build upon the previous one, creating a cohesive narrative. A clear structure provides readers with a mental framework, making it easier to navigate and retain information; This overarching organization is crucial for a successful and impactful book.

Chapter Breakdown: Detailed Outline

Each chapter should focus on a specific facet of the core subject, broken down into manageable subtopics. Develop a detailed outline for each, listing key points, examples, and any supporting visuals. Ensure a logical flow within each chapter, guiding the reader seamlessly through the information.

Consider using headings and subheadings to improve readability and scannability. A well-defined chapter breakdown acts as a miniature roadmap, ensuring clarity and preventing information overload. This detailed approach transforms a broad topic into digestible, actionable steps for the reader.

Chapter Titles and Subtopics

Compelling chapter titles should accurately reflect the content while sparking reader interest. Subtopics should logically dissect the main theme, offering granular detail and a clear progression of ideas. Aim for concise, descriptive titles that immediately convey the chapter’s focus.

Subtopics act as building blocks, each contributing to the overall understanding. Use action verbs and keywords to enhance clarity and searchability. A well-structured hierarchy of titles and subtopics transforms complex information into an easily navigable and digestible format, improving the reader’s experience.

Logical Flow and Sequencing

Establishing a smooth logical flow is paramount for effective book instructions. Chapters should build upon each other, creating a natural progression of knowledge. Sequencing involves carefully ordering topics, starting with foundational concepts and advancing to more complex procedures.

Consider the reader’s learning curve; introduce information incrementally. Utilize transitional phrases and summaries to connect ideas and reinforce understanding. A disjointed sequence can lead to confusion and frustration, hindering the learning process. Prioritize clarity and coherence to ensure a seamless and engaging reading experience.

Writing Style and Tone

Maintaining a consistent and appropriate writing style is crucial for book instructions. Clarity and conciseness should be prioritized, avoiding jargon or overly complex sentence structures. The tone should be informative and encouraging, fostering a positive learning environment.

Adopt a voice that resonates with your target audience – whether formal or informal. Active voice generally enhances readability. Proofread meticulously for grammatical errors and inconsistencies. A well-crafted style builds trust and ensures readers can easily grasp the presented information, ultimately maximizing comprehension and success.

Visual Elements and Formatting

Strategic integration of visual elements significantly enhances book instruction comprehension. Utilize images, diagrams, and charts to illustrate complex concepts or processes, breaking up dense text. Thoughtful formatting, including clear headings, subheadings, and bullet points, improves scannability.

Font choices should prioritize readability; sans-serif fonts are often preferred for on-screen viewing. Consistent layout and ample white space prevent visual clutter. Consider color schemes that are both aesthetically pleasing and accessible. Effective visuals and formatting transform instructions from daunting to digestible, boosting user engagement.

Use of Images, Diagrams, and Charts

Illustrative visuals are paramount in book instructions, clarifying complex steps or concepts. Diagrams excel at showcasing processes, while charts effectively present data or comparisons. Images should directly relate to the text, enhancing understanding, not merely decorating the page.

Ensure all visuals are high-resolution and clearly labeled. Captions should concisely explain the image’s relevance. Consider accessibility – provide alt text for screen readers. A well-chosen visual can replace paragraphs of explanation, making instructions more intuitive and engaging for diverse learners, ultimately improving comprehension.

Font Choices and Layout

Typography and layout significantly impact readability in book instructions. Opt for clear, legible fonts – sans-serif fonts like Arial or Helvetica are often preferred for instructions. Maintain consistent font sizes for headings, subheadings, and body text. Ample white space is crucial; avoid dense blocks of text.

Use bullet points and numbered lists to break down steps. Logical visual hierarchy guides the reader. Consider column width for optimal reading flow. Ensure sufficient contrast between text and background. A clean, uncluttered layout minimizes cognitive load, allowing users to easily follow instructions and achieve desired outcomes.

Step-by-Step Instructions: Clarity and Precision

Effective book instructions hinge on clarity and precision in step-by-step guidance. Each step must be concise, actionable, and devoid of ambiguity. Begin with a clear overview of the process. Use imperative verbs (“Connect,” “Press,” “Select”) to directly address the user. Number each step sequentially for easy following.

Incorporate visual aids like diagrams or screenshots to illustrate complex actions. Avoid jargon or technical terms without explanation. Test instructions with target users to identify potential confusion. Prioritize a logical flow, building from simple to complex tasks. Precise language minimizes errors and maximizes user success.

Troubleshooting and FAQs

Anticipate potential user difficulties by including a dedicated troubleshooting section. Identify common errors or roadblocks and provide clear, concise solutions. Frame this as a Frequently Asked Questions (FAQ) section for easy navigation. Address questions regarding setup, operation, and error messages.

Offer multiple solutions where applicable, catering to varying user skill levels. Include screenshots illustrating error states and corrective actions. Encourage users to report unresolved issues. A well-crafted troubleshooting guide reduces frustration and enhances user confidence. Regularly update this section based on user feedback and emerging problems.

Safety Precautions and Warnings

Prioritize user safety by prominently displaying all relevant precautions and warnings. Clearly identify potential hazards associated with following the book’s instructions. Use bold text, warning symbols, and contrasting colors to draw attention to critical information. Specify necessary protective equipment, like gloves or eyewear, when applicable.

Detail potential risks of misuse or improper execution of steps. Include disclaimers regarding manufacturer liability. Advise users to consult professionals if unsure about any procedure. Regularly review and update safety information to reflect current best practices and regulations. A comprehensive safety section demonstrates responsible authorship.

Glossary of Terms

A comprehensive glossary enhances accessibility, especially for complex book instructions. Define specialized terminology, technical jargon, and any potentially unfamiliar words used throughout the text. Entries should be concise yet thorough, providing clear and understandable explanations. Arrange terms alphabetically for easy reference.

Consider including diagrams or illustrations alongside definitions when applicable. Cross-reference glossary terms with their first appearance in the main text. Regularly review and update the glossary to ensure accuracy and completeness. A well-maintained glossary empowers readers and minimizes confusion, fostering a positive learning experience.

Indexing and Cross-Referencing

A robust index is crucial for navigating detailed book instructions. Include keywords, concepts, and specific terms, directing readers to relevant pages. Employ sub-entries for nuanced topics, enhancing searchability. Cross-referencing connects related information within the book, guiding users through interconnected concepts.

Use “See also” references to point readers to additional helpful sections. Ensure consistency in terminology across the index and the main text. Regularly review and update both the index and cross-references during revisions. Effective indexing and cross-referencing significantly improve usability and reader comprehension.

Testing and Revision

Thorough testing is paramount for book instructions. Recruit diverse users representing your target audience to follow the steps precisely. Observe their process, noting areas of confusion or difficulty. Gather feedback through questionnaires and interviews, focusing on clarity and completeness.

Revise instructions based on testing results, addressing ambiguities and streamlining procedures. Proofread meticulously for errors in grammar, spelling, and technical accuracy. Consider multiple revision cycles, incorporating feedback at each stage. A well-tested and revised book ensures user success and minimizes frustration.

Legal Considerations and Copyright

Protecting your work requires careful attention to legal aspects. Secure copyright for your book instructions, preventing unauthorized reproduction or distribution. If incorporating external materials—images, quotes, or data—obtain necessary permissions and provide proper attribution.

Include a clear copyright notice and disclaimer regarding liability for user actions. Consult legal counsel to ensure compliance with relevant laws and regulations, especially concerning safety warnings and intellectual property. Address potential risks and limitations within the instructions themselves, safeguarding both author and user.

Ultimately, well-crafted book instructions empower users with knowledge and confidence. A meticulously planned structure, clear writing, and robust visual aids are paramount. Prioritizing safety, addressing potential issues, and ensuring legal compliance builds trust and minimizes risk.

Remember, effective instructions aren’t merely about how to do something, but about fostering understanding and successful outcomes. Thorough testing and revision refine clarity, while a comprehensive glossary and index enhance accessibility. A well-executed instruction book is a valuable resource, leaving a lasting positive impression.

Categories
Instructions

instructions for matrix opti smooth

Matrix Opti Smooth offers a transformative hair experience, inspired by cinematic worlds and mathematical precision. This smoothing system, rooted in decades of haircare innovation, delivers sleek, manageable results.

The term “Matrix,” originating in mathematical contexts, now symbolizes a complex, interconnected system – mirroring the technology behind this smoothing treatment.

What is Matrix Opti Smooth?

Matrix Opti Smooth is a professional smoothing treatment designed to transform unruly, frizzy hair into sleek, manageable locks. Unlike temporary straightening methods, Opti Smooth utilizes a unique polymer technology to alter the hair’s internal structure, reducing frizz and enhancing shine for up to twelve weeks.

This isn’t merely a cosmetic fix; it’s a scientifically-backed process. The treatment works by coating each hair strand with a smoothing complex, effectively relaxing the cuticle and creating a smoother, more uniform surface. Inspired by the concept of a “matrix” – a complex system – the formula interacts with the hair on a molecular level, delivering long-lasting results. It’s a sophisticated solution for those seeking effortless style and reduced styling time.

The History of Matrix and the Term “Matrix”

Matrix boasts a rich history in the professional haircare industry, evolving from a brand focused on color to a comprehensive provider of salon-quality solutions. The name “Matrix” itself has fascinating origins, stemming from 19th-century mathematics where it denoted an arrangement of numbers. British mathematician James Sylvester first used the term in this context.

The adoption of “Matrix” by the brand reflects a commitment to complex, interconnected formulas – much like the smoothing technology in Opti Smooth. The term gained wider cultural recognition through films like “The Matrix,” symbolizing a simulated reality, yet for Matrix haircare, it represents a real transformation. This duality—complexity and transformation—underpins the brand’s philosophy.

Understanding the Science Behind Opti Smooth

Opti Smooth utilizes advanced polymer technology to restructure hair at a molecular level, delivering lasting smoothness and frizz control through a scientifically-backed formula.

Key Ingredients in Matrix Opti Smooth

Matrix Opti Smooth’s efficacy stems from a carefully curated blend of ingredients designed to deliver optimal smoothing results. While specific formulations may vary, core components consistently include polymers – crucial for restructuring the hair fiber. These polymers work internally, creating a flexible network that reduces frizz and enhances manageability.

Additionally, the formula often incorporates conditioning agents like oils and emollients to nourish and hydrate the hair, preventing dryness and maintaining a healthy shine. Amino acids contribute to strengthening the hair shaft, minimizing breakage during and after the smoothing process. The precise balance of these ingredients ensures both effective smoothing and long-term hair health, mirroring the complex systems represented by the term “Matrix.”

How Opti Smooth Works on a Molecular Level

Matrix Opti Smooth operates by penetrating the hair’s cortex, the innermost layer responsible for strength and structure. The polymers within the formula interact with the disulfide bonds – chemical links that determine hair’s natural texture, including curl and wave patterns. These bonds are temporarily rearranged, creating a smoother, more aligned hair fiber.

This process doesn’t permanently alter the hair’s natural structure, but rather temporarily modifies it, reducing frizz and increasing manageability. The conditioning agents simultaneously deposit moisture and nutrients, improving the hair’s overall health. This molecular-level restructuring, akin to the interconnectedness of a “Matrix,” delivers long-lasting smoothness and shine.

The Role of Polymers in Smoothing

Polymers are the cornerstone of Matrix Opti Smooth’s efficacy, acting as smoothing agents and protective shields. These large molecules envelop the hair shaft, creating a flexible film that reduces friction and minimizes frizz. Different polymer types contribute unique benefits; some offer thermal protection during heat styling, while others enhance shine and detangling.

The carefully selected polymers in Opti Smooth work synergistically to reshape the hair’s structure without causing damage. They temporarily alter the disulfide bonds, allowing for easier manageability and a sleek appearance. This polymer network, much like a complex “Matrix,” provides a temporary, smoothing effect, leaving hair healthy and radiant.

Preparing for Application

Proper preparation is crucial for optimal Matrix Opti Smooth results. Assess hair type, conduct a strand test, and gather necessary tools – clips, gloves, and a brush – for success.

Hair Type Suitability

Matrix Opti Smooth demonstrates remarkable versatility, effectively catering to a broad spectrum of hair types. However, understanding your hair’s unique characteristics is paramount for achieving the desired outcome. Generally, this treatment excels on medium to coarse hair textures exhibiting moderate to high levels of frizz or wave.

Those with fine or heavily processed hair should exercise caution and prioritize a thorough strand test, as over-processing can lead to unwanted damage. Hair that has undergone recent chemical services – such as coloring or perming – may require adjusted processing times or alternative approaches. Consulting with a professional stylist experienced in Opti Smooth application is highly recommended to determine suitability and customize the treatment plan.

Conducting a Strand Test

Prior to a full application of Matrix Opti Smooth, a strand test is absolutely crucial. Select a small, inconspicuous section of hair – ideally from the nape of the neck. Apply the Opti Smooth formula precisely as you would during a complete treatment, adhering to the recommended processing time.

Thoroughly rinse and assess the results. Observe the hair’s texture, smoothness, and overall condition. This test reveals how your hair responds to the formula, identifying potential issues like excessive straightening, unwanted color changes, or damage. Document your observations carefully; this informs adjustments to the application process, ensuring optimal and safe results for your entire head of hair.

Necessary Tools and Equipment

For a successful Matrix Opti Smooth application, gather essential tools. You’ll require a non-metallic bowl and applicator brush for precise formula distribution. Sectioning clips are vital for organized hair division. Gloves protect your hands, while a timer ensures accurate processing.

A wide-tooth comb aids in even product saturation. A pH-balancing shampoo and deep conditioning mask are crucial for post-treatment care. A hairdryer with a diffuser attachment is recommended for gentle drying. Finally, have clean towels readily available. Proper preparation streamlines the process and maximizes the smoothing treatment’s effectiveness.

Step-by-Step Application Guide

Begin with precise hair sectioning, ensuring even product distribution. Apply the Opti Smooth formula systematically, saturating each strand. Monitor processing carefully, adhering to recommended timings for optimal results.

Sectioning the Hair

Achieving optimal results with Matrix Opti Smooth hinges on meticulous hair sectioning. Begin by dividing the hair into four quadrants – from crown to nape, and ear to ear. Further subdivide each quadrant into smaller, manageable sections, approximately 1-2 inches thick. This ensures complete product saturation and even processing throughout the entire head.

For thicker hair densities, consider even smaller sections. Utilize clips to securely hold each section, preventing overlap and maintaining clarity during application. Consistent section size is paramount for uniform smoothing. Remember, thorough sectioning is the foundation for a flawless Opti Smooth treatment, minimizing inconsistencies and maximizing the benefits.

Applying the Opti Smooth Formula

Precise application of the Matrix Opti Smooth formula is crucial for success. Using an applicator brush, begin at the nape of the neck, applying the formula to each section, starting ½ inch away from the scalp. Ensure complete saturation, working the product through from root to tip. Avoid excessive product application, as this can lead to unwanted buildup.

Maintain consistent pressure and a smooth, even stroke throughout the application process. For previously chemically treated hair, pay close attention to porosity and adjust saturation accordingly. Regularly check sections to guarantee uniform coverage, ensuring every strand receives the smoothing benefits of Opti Smooth.

Processing Time and Monitoring

Following application, carefully monitor the hair during the processing phase. Processing time varies based on hair type and condition, typically ranging from 20 to 30 minutes. Regularly check a strand every 5-10 minutes to assess smoothing progress. Visual cues, like a change in hair texture, indicate readiness.

Avoid exceeding the maximum recommended processing time to prevent potential damage. Maintaining consistent temperature and humidity levels in the salon is vital for optimal results. Throughout processing, avoid manipulating the hair excessively to ensure even smoothing. Careful monitoring guarantees a safe and effective treatment.

Rinsing and Conditioning

Thoroughly rinse the hair with lukewarm water, ensuring all traces of the Opti Smooth formula are removed. Follow with a pH-balancing conditioner and a deep-conditioning mask.

Thorough Rinsing Techniques

Achieving a complete rinse is paramount after the Opti Smooth treatment. Begin with lukewarm water, avoiding extreme temperatures that could shock the hair. Section the hair and direct the water stream at the roots, meticulously working your way down the lengths.

Ensure water penetrates each strand, dissolving any remaining formula residue. Gently massage the scalp to lift away product buildup. Continue rinsing for an extended period – typically 5-10 minutes – until the water runs completely clear.

A final cool-water rinse can help seal the cuticle, enhancing shine and smoothness. Avoid harsh scrubbing, which can cause friction and potential damage. Patience and diligence during rinsing are key to optimal results.

Using a pH-Balancing Conditioner

Following the Opti Smooth treatment, a pH-balancing conditioner is crucial for restoring the hair’s natural acidity. The smoothing process can temporarily alter the pH level, leaving hair vulnerable to damage and frizz. Select a conditioner specifically formulated to neutralize alkalinity and seal the cuticle.

Apply the conditioner generously, focusing on mid-lengths and ends. Avoid the scalp to prevent oiliness. Allow it to penetrate for 3-5 minutes, enabling it to effectively rebalance the pH.

Rinse thoroughly with cool water, ensuring no residue remains. This step is vital for long-term hair health and maintaining the smoothness achieved with Opti Smooth.

Post-Treatment Mask Application

To maximize the benefits of Matrix Opti Smooth, a deep conditioning mask is essential post-treatment. This step replenishes moisture lost during the smoothing process and strengthens the hair fiber. Choose a mask rich in nourishing ingredients like argan oil, shea butter, or keratin proteins.

Apply the mask liberally to damp hair, ensuring complete saturation from root to tip. Gently comb through to distribute evenly. Cover with a plastic cap and allow it to process for 10-20 minutes, utilizing gentle heat for enhanced penetration.

Rinse thoroughly with cool water, revealing soft, hydrated, and remarkably smooth hair.

Styling After Opti Smooth

Post-Opti Smooth styling prioritizes heat protection and smoothing serums. Embrace blow-drying and flat ironing for polished results, while minimizing harsh manipulation for longevity.

Heat Styling Considerations

Following Matrix Opti Smooth, heat styling can enhance smoothness and extend the treatment’s lifespan, but careful consideration is crucial. Always apply a thermal protectant spray before using any heat tools – this shields the hair from potential damage and preserves the smoothing effect.

Lower heat settings are recommended; excessive heat can compromise the formula and introduce frizz. When blow-drying, utilize a nozzle attachment to direct airflow and smooth the cuticle. Flat irons should be used in a gliding motion, avoiding prolonged contact with any single strand.

Regular use of heat, even with protection, can gradually diminish the treatment’s effects, so incorporating heatless styling methods into your routine is beneficial.

Recommended Styling Products

To maximize the benefits of Matrix Opti Smooth, selecting appropriate styling products is essential. Lightweight serums and oils, specifically designed for smoothed hair, provide added shine and frizz control without weighing it down. Avoid products containing alcohol, as these can dry out the hair and disrupt the smoothing effect.

Humidity-resistant styling creams and mousses help maintain smoothness in challenging weather conditions. Look for formulas that offer flexible hold, allowing for natural movement while preventing reversion to the hair’s original texture.

Matrix offers complementary products formulated to work synergistically with Opti Smooth, enhancing and prolonging the treatment’s results.

Maintaining Smoothness: Daily Routine

A consistent daily routine is crucial for preserving the effects of Matrix Opti Smooth. Utilize a sulfate-free shampoo and conditioner to gently cleanse and hydrate the hair, avoiding harsh stripping that can compromise the smoothing treatment.

Minimize heat styling whenever possible; when heat is necessary, always apply a heat protectant spray. Consider using silk or satin pillowcases to reduce friction and prevent frizz overnight.

Regularly use a leave-in conditioner or smoothing serum to maintain manageability and shine. Avoid products with heavy oils that could build up and weigh the hair down, diminishing the sleekness.

Troubleshooting Common Issues

Addressing challenges post-treatment is key. Uneven application or frizz can occur; damaged hair requires immediate attention with deep conditioning and professional advice.

Dealing with Uneven Application

Uneven application of the Matrix Opti Smooth formula can sometimes occur, particularly for those new to the process or working with varied hair densities. If you notice inconsistencies after rinsing, don’t panic! The first step is to assess the affected areas carefully. Gently reapply a small amount of the Opti Smooth formula only to the under-treated sections, ensuring thorough saturation.

Process for a reduced time – approximately half of the original – and monitor closely. Avoid overlapping onto previously treated hair to prevent over-processing. Following the adjusted processing time, rinse meticulously and follow with a pH-balancing conditioner and deep conditioning mask to restore overall hair health and uniformity. Remember, precision in sectioning during the initial application is crucial for preventing this issue.

Addressing Frizz or Curl Reversion

Frizz or curl reversion post-Matrix Opti Smooth can be disheartening, but is often manageable. Humidity is a primary culprit; ensure you’re utilizing anti-humidity styling products. If reversion occurs, a quick touch-up with a flat iron set to a moderate temperature can effectively smooth the hair. However, avoid excessive heat.

Deep conditioning treatments are vital to reinforce the smoothing effect and restore internal moisture balance. Consider a leave-in conditioner with smoothing polymers. If frizz persists, evaluate your rinsing technique – residual product can attract moisture. Finally, remember that the treatment’s longevity depends on proper aftercare and minimizing exposure to environmental stressors.

What to Do if Hair Feels Damaged

If hair feels damaged after Matrix Opti Smooth, immediate action is crucial. Discontinue heat styling entirely and focus on intensive repair. Protein treatments can help rebuild the hair’s structure, but use them cautiously to avoid further stress. Deep conditioning masks, rich in moisturizing ingredients like shea butter or argan oil, are essential for restoring hydration.

Avoid harsh chemicals and sulfates in your shampoo and conditioner. A pH-balancing treatment can help restore the hair’s natural equilibrium. If damage is severe, consult a professional stylist for personalized advice and potential restorative services. Prioritize gentle handling and minimize manipulation.

Long-Term Hair Health

Maintaining hair health post-Opti Smooth requires consistent deep conditioning, preventative measures against damage, and a professional maintenance schedule for optimal results.

Preventative Measures for Damage

Protecting your investment in Opti Smooth requires diligent aftercare. Minimize heat styling whenever possible, and when you do use heat, always apply a thermal protectant spray formulated for chemically treated hair. Avoid harsh chemical services like perms or excessive coloring immediately following the Opti Smooth treatment, as these can compromise the smoothing effect and potentially cause damage.

Furthermore, be gentle with your hair when wet, as it’s most vulnerable during this state. Use a wide-tooth comb to detangle, starting from the ends and working your way up to the roots. Consider using a silk or satin pillowcase to reduce friction and breakage while you sleep, preserving the smoothness and health of your hair over time.

Regular Deep Conditioning Treatments

To maintain the health and longevity of your Opti Smooth results, incorporate regular deep conditioning treatments into your hair care routine. Aim for at least once a week, utilizing a mask specifically designed for color-treated or chemically straightened hair. These masks replenish moisture lost during the smoothing process and help strengthen the hair shaft, preventing breakage and frizz.

Look for ingredients like argan oil, shea butter, or keratin to provide intense hydration and repair. Apply the mask generously, focusing on the mid-lengths and ends, and leave it on for the recommended time – often 10-20 minutes – before rinsing thoroughly. This proactive approach ensures lasting smoothness and vitality.

Professional Maintenance Schedule

To preserve your Matrix Opti Smooth results and hair health, a professional maintenance schedule is crucial. Typically, touch-ups are recommended every 12-16 weeks, depending on hair growth and texture. These appointments address new growth and maintain consistent smoothness throughout the hair.

Regular salon visits allow a professional stylist to assess your hair’s condition, adjust the formula if needed, and provide personalized advice. Avoid overlapping the Opti Smooth treatment onto previously treated hair to minimize potential damage. Consistent professional care extends the life of your smooth style and prevents reversion to your natural texture.

The Matrix Brand and its Evolution

Matrix began as a professional haircare innovator, evolving through decades of research. This dedication culminated in advanced technologies like Opti Smooth, delivering salon-quality results.

Matrix’s History in Haircare

Matrix emerged in 1985, born from the vision of hairdressers seeking personalized solutions. Initially focused on color, the brand quickly expanded, driven by a commitment to scientific advancement and professional collaboration. This dedication fostered a reputation for innovative formulas and transformative results, quickly gaining traction within the salon industry.

Throughout the 90s and 2000s, Matrix continued to pioneer new technologies, addressing diverse hair needs. They embraced the power of polymers and smoothing agents, laying the groundwork for future breakthroughs. This evolution culminated in the development of sophisticated smoothing systems, like Opti Smooth, designed to deliver sleek, healthy-looking hair. The brand’s consistent focus on education and partnership with stylists solidified its position as a leader in professional haircare.

The Development of Opti Smooth Technology

Opti Smooth represents a significant leap forward in smoothing technology, building upon Matrix’s decades of research into hair fiber science. Recognizing the limitations of early smoothing treatments, Matrix scientists focused on developing a formula that delivered long-lasting smoothness without compromising hair health. This involved meticulous ingredient selection and precise polymer engineering.

The key breakthrough lay in creating a system that effectively reshapes the hair’s internal structure, reducing frizz and enhancing manageability. Opti Smooth utilizes a unique blend of smoothing agents and conditioning polymers, working synergistically to deliver optimal results. Rigorous testing and refinement ensured a formula that’s both effective and gentle, setting a new standard in the smoothing category.

Comparing Opti Smooth to Other Smoothing Treatments

Opti Smooth distinguishes itself through a focus on hair health, offering a gentler alternative to harsh keratin or Brazilian blowout formulas, delivering lasting smoothness.

Keratin Treatments vs; Opti Smooth

Keratin treatments traditionally rely on formaldehyde or formaldehyde-releasing ingredients to break down and rebuild hair bonds, offering significant smoothing but potentially causing damage with repeated use. Matrix Opti Smooth, however, employs a polymer-based technology, creating a flexible film around the hair fiber.

This innovative approach delivers smoothing benefits without the harsh chemicals often associated with keratin treatments. While keratin focuses on internal structural changes, Opti Smooth works externally, enhancing manageability and reducing frizz. Opti Smooth’s gentler formulation minimizes the risk of breakage and maintains hair’s natural integrity, making it a preferable option for those seeking long-term hair health alongside smoothness.

Brazilian Blowouts vs. Opti Smooth

Brazilian Blowouts, like many keratin-based treatments, often contain formaldehyde, raising health concerns and potentially weakening hair over time. They aim for intense smoothing by altering the hair’s protein structure. Matrix Opti Smooth distinguishes itself through a polymer technology that coats the hair, providing smoothness and frizz control without harsh chemical alterations.

Opti Smooth offers a more flexible hold, allowing for natural movement, unlike the often rigid results of Brazilian Blowouts. This gentler approach preserves hair’s health and vitality, reducing the risk of damage. Opti Smooth prioritizes manageability and shine, delivering a polished finish without compromising long-term hair integrity.

Cost Analysis and Value

Matrix Opti Smooth typically ranges from $200 to $400, depending on hair length and salon location, representing a moderate investment in smoothing technology. While potentially higher upfront than some temporary solutions, Opti Smooth’s longevity – lasting up to 12 weeks – delivers significant value.

Considering the reduced styling time, minimized frizz, and improved hair manageability, the cost-per-use is competitive. Compared to frequent keratin treatments or daily styling product expenses, Opti Smooth offers a cost-effective, long-term solution for achieving consistently smooth, healthy-looking hair; The investment translates to both time and money saved.

Categories
Instructions

pentax me super instruction manual

Pentax ME Super Instruction Manual: A Comprehensive Guide

Welcome! This detailed manual assists users in maximizing their Pentax ME Super’s potential‚ offering a complete overview of its features and operation․

Explore comprehensive guides‚ service manuals‚ and Italian-language instructions readily available online for enhanced understanding and troubleshooting assistance․

The Pentax ME Super‚ a classic 35mm SLR‚ represents a significant step in photographic technology․ Released in 1979‚ it quickly gained popularity for its blend of advanced features and user-friendly operation․ This instruction manual serves as your guide to unlocking the full potential of this remarkable camera․

Whether you are a seasoned photographer or just beginning your journey‚ understanding the ME Super’s capabilities is key to capturing stunning images; Online resources‚ including service manuals and Italian-language guides‚ supplement this manual‚ offering diverse perspectives and support․ Prepare to delve into a world of creative possibilities with your Pentax ME Super!

Understanding the Pentax ME Super’s Key Features

The Pentax ME Super boasts several defining characteristics․ Its TTL (Through-The-Lens) averaging metering system provides accurate exposure readings across the entire frame‚ simplifying the photographic process․ The electronically controlled shutter‚ a hallmark of the ME Super‚ offers precise speed control․

Furthermore‚ the camera’s compatibility with a wide range of Pentax K-mount lenses expands creative options․ Online resources‚ including detailed manuals‚ highlight these features and more․ Mastering these key elements‚ detailed within this guide and supplemental materials‚ will empower you to achieve exceptional photographic results with your Pentax ME Super․

Camera Components & Their Functions

Explore the Pentax ME Super’s intricate parts! This section details each component – body‚ controls‚ shutter‚ aperture – and explains their crucial roles in image capture․

Body and Controls Overview

The Pentax ME Super’s body is a robust‚ yet lightweight construction designed for comfortable handling during extended shooting sessions․ Key controls are intuitively placed for easy access․ The top panel houses the shutter speed dial‚ film advance lever‚ and rewind crank․

The front of the camera features the lens mount‚ self-timer button‚ and depth-of-field preview lever․ Around the lens mount‚ you’ll find the aperture control ring‚ directly linked to the lens․ The camera’s base includes the film chamber and battery compartment․

On the rear panel‚ locate the film rewind release‚ film counter‚ and viewfinder eyepiece․ Understanding the location and function of each control is fundamental to mastering the Pentax ME Super․

Shutter Speed Dial & Operation

The Pentax ME Super’s shutter speed dial offers a range from 2 seconds to 1/1000th of a second‚ providing versatility for various shooting conditions․ ‘B’ (Bulb) mode allows for exposures longer than two seconds‚ ideal for astrophotography or light painting․

To adjust the shutter speed‚ rotate the dial until the desired setting aligns with the indicator mark․ Remember that faster shutter speeds freeze motion‚ while slower speeds allow more light in‚ potentially causing motion blur․

The dial also features an ‘A’ (Aperture Priority) setting‚ where the camera automatically selects the appropriate shutter speed based on the chosen aperture and light conditions․

Aperture Control & Depth of Field

The aperture ring on your Pentax ME Super lens controls the lens opening‚ influencing both the amount of light reaching the film and the depth of field․ Smaller apertures (higher f-numbers like f/16) yield greater depth of field‚ keeping more of the scene in focus – perfect for landscapes․

Larger apertures (lower f-numbers like f/2․8) create a shallow depth of field‚ isolating your subject with a blurred background – ideal for portraits․

Adjusting the aperture is crucial for creative control and achieving the desired look in your photographs․ Experiment with different settings to understand their impact․

Viewfinder Information & Metering System

The Pentax ME Super’s viewfinder provides essential shooting information․ You’ll see focusing spots‚ and most importantly‚ the TTL averaging metering system’s indicators․ This system measures light through the lens‚ offering accurate exposure readings․

LED indicators (+‚ -‚ 0) within the viewfinder guide you to correct exposure․ A “-” indicates underexposure (darker image)‚ a “+” overexposure (brighter image)‚ and “0” signifies correct exposure․

Understanding these indicators is key to utilizing the camera’s automatic exposure capabilities and achieving well-exposed photographs consistently․ Practice interpreting the readings in various lighting conditions․

Loading and Unloading Film

Proper film handling is crucial for successful photography․ This section details the step-by-step procedures for both loading 35mm film and safely removing it from the Pentax ME Super․

Film Loading Procedure ⎼ Step-by-Step

Begin by opening the film back lever located on the camera’s left side․ Insert the film canister into the film chamber‚ ensuring the spool teeth engage correctly․ Gently pull the film across the camera body towards the take-up spool․

Carefully thread the film leader onto the take-up spool‚ advancing it slightly by using the film advance lever․ Close the film back securely․

Advance the film two or three times‚ observing the rewind knob to confirm it rotates‚ indicating film is properly engaged․ Reset the frame counter to ‘S’ and advance the film again until ‘1’ appears‚ ready for your first exposure․ Always ensure the film is lying flat and advancing smoothly․

Film Rewinding & Removal

To rewind the film‚ locate the film rewind knob on the top of the camera․ Press the rewind release button on the bottom․ Gently pull up on the rewind knob and rotate it in the direction of the arrow․

Continue rotating the rewind knob until you feel resistance lessen‚ indicating the film leader has fully cleared the take-up spool․ Once fully rewound‚ open the film back lever․

Carefully remove the film canister․ Avoid exposing the film to direct sunlight during removal․ Properly dispose of or develop the exposed film promptly to preserve your images․ Ensure the camera is ready for the next roll!

Using the Exposure Meter

Master exposure! The Pentax ME Super utilizes a TTL averaging metering system‚ providing accurate readings through the viewfinder’s indicators for optimal results․

Metering Modes Explained (TTL Averaging)

Understanding TTL Averaging: The Pentax ME Super employs a Through-The-Lens (TTL) averaging metering system‚ a sophisticated method for determining correct exposure․ Unlike spot metering‚ which measures light from a small area‚ TTL averaging evaluates the brightness across the entire frame․ This is achieved by the camera sensing the light reflected from the film plane itself‚ after it passes through the lens․

This system calculates an average light level‚ providing a more balanced exposure suitable for most general photography scenarios․ The meter doesn’t prioritize any specific part of the scene; instead‚ it aims for an overall “correct” exposure․ However‚ scenes with high contrast – bright highlights and deep shadows – may require exposure compensation to prevent underexposure or overexposure of critical areas․ This averaging approach simplifies exposure determination for beginners while still offering reliable results․

Understanding Metering Indicators

Decoding the Indicators: The Pentax ME Super’s viewfinder displays a series of LEDs (+‚ -‚ and a center dot) to indicate exposure levels․ The center dot signifies correct exposure‚ meaning the camera believes the scene will be properly exposed at the current settings․ A “+” indicator suggests overexposure – the scene is too bright‚ and you should decrease aperture or increase shutter speed․ Conversely‚ a “-” indicator signals underexposure – the scene is too dark‚ requiring an increased aperture or slower shutter speed․

These LEDs provide a quick and intuitive visual guide․ Remember that these are suggestions; artistic intent or challenging lighting may necessitate deviating from the indicated settings․ Pay attention to the blinking indicators‚ as they often signal the meter’s limits or potential issues․

Exposure Compensation Techniques

Overriding the Meter: The Pentax ME Super allows for exposure compensation‚ crucial when the camera’s meter is fooled by tricky lighting․ Use the exposure compensation dial‚ typically marked with +/- values‚ to adjust the metered exposure․ Positive values (+1‚ +2) brighten the image‚ useful for backlit subjects or snow scenes․ Negative values (-1‚ -2) darken the image‚ ideal for very bright subjects or situations where you want to retain highlight detail․

Experimentation is key! Start with small adjustments and review your results․ Remember to return the dial to ‘0’ after use to avoid unintentionally affecting subsequent shots․ Understanding when and how to compensate ensures accurate and creatively controlled exposures․

Focusing & Image Composition

Achieve sharpness! Utilize the focusing screen and aids for precise focus․ Employ the depth of field preview to visualize the area in acceptable focus․

Focusing Screen & Focusing Aids

The Pentax ME Super’s focusing screen is your primary tool for achieving sharp images․ It features split-image and microprism collar zones‚ designed to assist in precise manual focusing․ The split-image area creates two offset images; when perfectly aligned‚ your subject is in focus․

The microprism collar surrounds the split-image‚ offering a textured appearance that becomes clearer as focus improves․ These aids are particularly useful in low-light conditions or when focusing on subjects lacking strong contrast․ Remember to adjust your eye position slightly to ensure accurate viewing through the viewfinder․ Regularly cleaning the focusing screen is crucial for maintaining optimal clarity and focusing performance․

Depth of Field Preview Lever

The Depth of Field Preview lever‚ located near the lens mount‚ allows you to visually assess the extent of focus at your chosen aperture before taking the picture․ Pressing and holding this lever stops down the lens to the selected f-stop‚ simulating the actual depth of field․

This is incredibly useful for landscape or portrait photography where precise focus control is essential․ Observe the viewfinder; areas appearing sharp with the lever depressed will remain in focus in your final image․ Releasing the lever returns to the maximum aperture for brighter viewing․ Utilize this feature to confidently determine optimal focus and creative depth of field․

Composition Guidelines for Better Photos

Elevate your photography with thoughtful composition! The Pentax ME Super empowers you to create visually striking images․ Employ the Rule of Thirds – imagine dividing your viewfinder into nine equal parts and positioning key elements along these lines or intersections․

Leading lines draw the viewer’s eye into the scene‚ while framing utilizes elements within the shot to highlight your subject․ Consider symmetry‚ patterns‚ and negative space for impactful results․ Experiment with different viewpoints and angles․ Remember‚ strong composition enhances storytelling and transforms ordinary scenes into captivating photographs․

Advanced Features & Techniques

Unlock creative potential! Explore multiple exposures‚ the self-timer‚ and external flash capabilities with your Pentax ME Super for unique photographic effects․

Multiple Exposure Capability

Creating layered images is simple! The Pentax ME Super allows for intriguing multiple exposures‚ letting you superimpose several images onto a single frame․ To engage this feature‚ you must first activate the multiple exposure mode‚ typically via a dedicated switch or setting on the camera body․

After activation‚ each time you press the shutter release‚ a new exposure is added to the film․ Remember to manually advance the film after each desired exposure‚ preventing automatic advancement․ This grants full control over the layering process․ Experiment with different exposure times and compositions to achieve surreal and artistic effects․

Carefully consider your metering‚ as cumulative exposure can easily lead to overexposure․ Deactivating the multiple exposure mode is crucial before resuming normal shooting!

Self-Timer Functionality

Capture yourself in the shot! The Pentax ME Super features a convenient self-timer‚ ideal for group photos or when you need to be included in the frame․ Activation is typically achieved by sliding a lever or pressing a button‚ initiating a short delay before the shutter releases․

The delay duration is usually fixed‚ allowing a few seconds to compose yourself and reach your desired position․ During the delay‚ a small indicator light illuminates‚ signaling the impending exposure․ Ensure you’re fully prepared before activating the self-timer‚ as there’s limited time to react․

Remember to deactivate the self-timer after use to prevent accidental delays during normal shooting․ It’s a simple yet effective tool for expanding your photographic possibilities!

Using External Flash Units

Expand your lighting options! The Pentax ME Super allows for versatile lighting through the use of external flash units․ A hot shoe on top of the camera provides a direct electrical connection for synchronized firing․ Ensure the flash unit is securely mounted and compatible with the camera’s sync speed․

TTL (Through-The-Lens) flash metering is supported‚ enabling automatic exposure control with compatible Pentax flash units․ For manual flash control‚ adjust the flash power settings independently․ Remember to consider the flash’s guide number and aperture settings for proper exposure․

Experiment with different flash positions and modifiers to achieve creative lighting effects․ Proper flash usage significantly enhances image quality in challenging lighting conditions․

Maintenance & Troubleshooting

Keep your camera in top condition! Regular cleaning‚ battery care‚ and addressing common issues ensure optimal performance and longevity of your Pentax ME Super․

Cleaning the Camera Body & Lens

Maintaining pristine condition is crucial․ Gently wipe the camera body with a soft‚ dry cloth to remove dust and fingerprints․ Avoid harsh chemicals or abrasive cleaners‚ as these can damage the finish․

For the lens‚ use a dedicated lens cleaning cloth and solution specifically designed for photographic optics․ Apply a small amount of solution to the cloth‚ not directly onto the lens․

Use circular motions‚ working from the center outwards․ Remove any stubborn smudges with a gentle‚ careful approach․ Regularly cleaning both the body and lens will ensure clear images and prolong the life of your Pentax ME Super․ Protect both from extreme temperatures and humidity․

Common Issues & Solutions

Encountering problems? A frequent issue is the shutter not firing‚ often due to a weak battery – ensure a fresh battery is installed․ If the light meter is inaccurate‚ double-check the ISO setting and exposure compensation․

Film advance difficulties can stem from improper loading; review the film loading procedure carefully․ Sticky shutter curtains may require professional servicing;

If the viewfinder is dim‚ clean the focusing screen gently․ Always consult online resources and service manuals for detailed troubleshooting steps․ Remember‚ attempting complex repairs yourself could cause further damage; professional help is recommended for significant issues․

Battery Replacement & Care

Powering your Pentax ME Super requires careful battery management․ The camera utilizes a specific battery type; consult the specifications for the correct voltage and size․ Replacement is straightforward‚ typically involving a compartment on the camera’s back or bottom․

Always handle batteries with care‚ avoiding contact with metal objects to prevent short circuits․ Remove batteries for extended storage to prevent corrosion․

Dispose of used batteries responsibly‚ following local regulations․ Regularly check the battery contacts for cleanliness; a small amount of corrosion can hinder performance․ A fresh battery ensures accurate metering and reliable operation․

Specifications & Technical Details

Explore detailed specifications! Discover the Pentax ME Super’s technical data‚ including shutter speeds‚ film compatibility‚ and dimensions‚ for a complete understanding․

Pentax ME Super Technical Specifications

Camera Type: 35mm SLR (Single Lens Reflex) camera․

Shutter: Horizontal-travel focal plane shutter‚ offering speeds from 2 seconds to 1/1000th of a second‚ plus Bulb mode․

Metering System: TTL (Through-The-Lens) averaging metering system‚ responding to both reflected and transmitted light․

Metering Range: EV3 to EV17 at ASA 100‚ with film speed settings from ASA 12 to ASA 3200․

Viewfinder: Fixed pentaprism viewfinder with approximately 93․5% coverage and a split-image focusing aid․

Film Advance: Manual film advance with a single stroke lever․

Film Rewind: Automatic film rewind with a rewind crank․

Flash Synchronization: X-sync at 1/60th of a second․

Dimensions: Approximately 146mm (W) x 87mm (H) x 48․5mm (D);

Weight: Approximately 580g (without lens)․

Lens Compatibility Information

Pentax K-Mount: The Pentax ME Super utilizes the Pentax K-mount‚ a bayonet mount system renowned for its versatility and secure lens attachment․

K-Mount Lenses: Compatible with a vast array of Pentax K-mount lenses‚ including those from third-party manufacturers․

Aperture Control: Aperture control is managed via the lens itself‚ offering precise control over depth of field and exposure․

Metering Compatibility: Full metering compatibility with all K-mount lenses that feature automatic aperture control․

Older Lenses: Older Pentax lenses may require slight adjustments or adapters for optimal performance․

Modern Lenses: Modern K-mount lenses offer enhanced optical quality and features‚ expanding creative possibilities․

Adapters: Adapters are available to mount lenses from other systems‚ broadening lens selection․

Focusing: Manual focusing is standard‚ providing a tactile and precise shooting experience․